View patron status
The Patron Status page lets you view information about a particular patron, such as checkouts, fines, a current transaction summary, and more. You can also print a replacement barcode label for a patron.
For more on patron status for Resource Manager, see Patron Status (Resource Manager).
Use the following steps to view a patron's status page:
- Select Circulation > Patron Status.
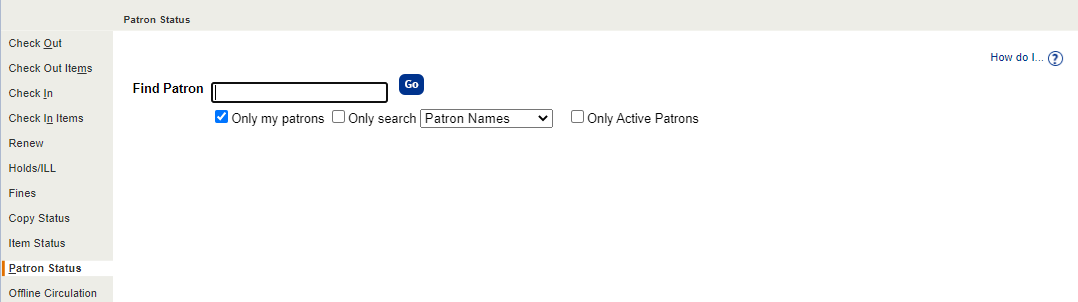
- Either:
- Scan the patron's barcode in the Find Patron field.
- Type the Barcode and click Go, or press Enter.
Note: If you do not have the patron's barcode, enter the patron's first, middle, or last name, nickname, grade level, homeroom, user name, a value in one of the User Defined fields, or a District ID. You can also enter part of the name, followed by *.
- To expand the search to other schools in your district, deselect the Only my patrons checkbox.
- To speed the search, select the Only search checkbox and then a field from the drop-down.
- To complete the task for active patrons, select the Only Active Patrons checkbox.
- Click Go. If a list appears, select the correct patron.
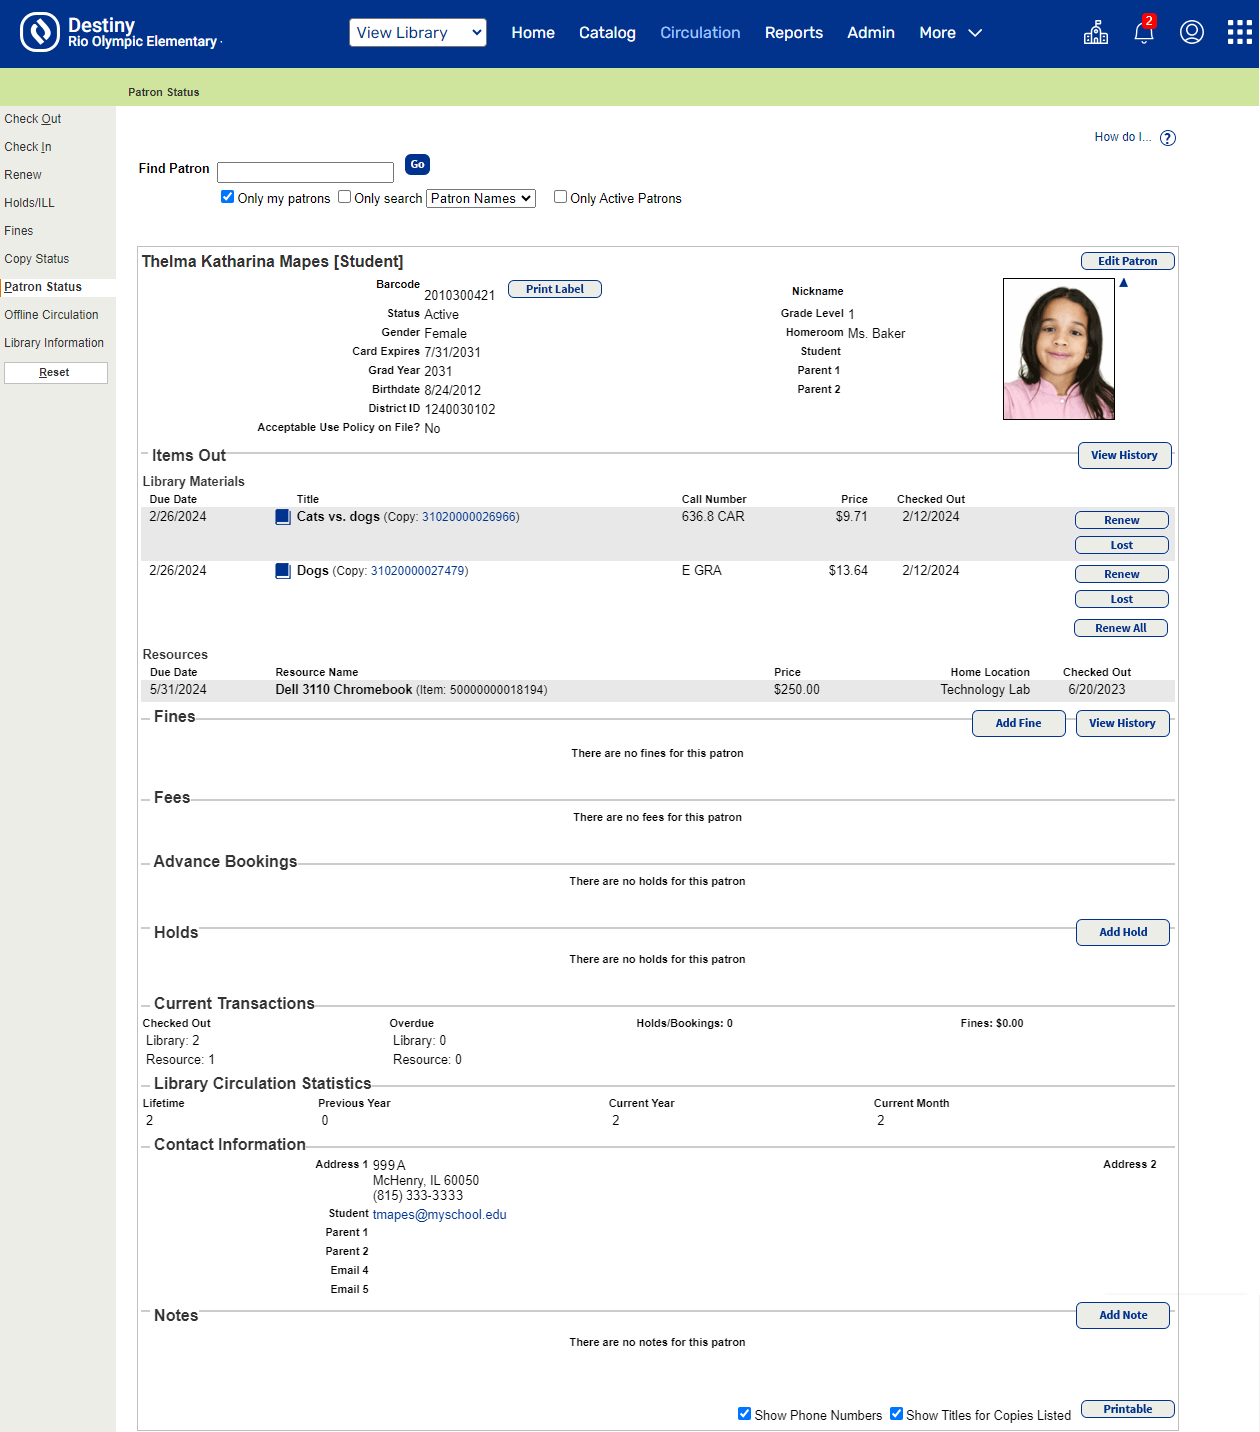
At the top of the page, an alert message about holds, overdues, fines, or an important note may appear. Beneath the alert message (if any), basic information about the patron appears.
If the patron is associated with your school, Destiny displays the patron's local barcode. Otherwise, Destiny displays the barcode from the patron's primary site.
Check in textbooks by ISBN
- Select Circulation > Patron Status.
- To complete the task for active patrons, select the Only Active Patrons checkbox.
- In the Find Patron field, scan or type in the patron's barcode.
- In the row of the applicable ISBN (unbarcoded) copy, click Check In.
- Repeat as needed.
| Note: Resource Manager only. |
Print a replacement barcode label
Next to the patron’s barcode number at the top of the page, click Print Label. The Print Patron Barcodes page appears.
Access a patron's checkout history
To view the patron's checkout history, next to Items Out, click View History.
Manage a patron's transactions
The Items Out section lists all the patron's current checkouts.
- Overdue items have the due date in red.
- Copies or items borrowed from other libraries have the lending site's name before the barcode number.
Access a patron's checkout history
To view the patron's detailed checkout history, next to Items Out, click View History.
|
Note: In Library Manager, the available history may be limited if the district opted to purge patron checkout history. |
Renew a patron's checkout
To renew a copy or resource item, click Renew next to the copy or item.
- For library materials, the new due date is determined by your library's loan policies that were defined in Admin > Library Policies.
For an ILL, the new due date is determined by the lending library's loan policies. - For textbooks, the new due date is the class due date or the default textbook due date defined in Admin > Textbook Policies.
- For resource items, the new due date is the due date for the resource type defined in Admin > Resource Policies.
To renew a copy using a different due date, select Circulation > Renew. For step-by-step instructions, see Renew Checkouts.
|
Note: You cannot renew an ILL in Circulation > Renew. If the lending library allows renewals of their materials, you can renew them in either Check Out or Patron Status. |
To renew all of the patron's checkouts, click Renew All at the bottom of the list.
This only renews local checkouts, not off-site checkouts.
Mark a patron's checkout Lost or Stolen
To mark any checkout lost:
Click Lost next to the item.
- If your school or library charges fines for lost checkouts, an alert message lets you do so.
- If you opted to have fines automatically calculated, the alert message lets you accept the fine, edit the amount, or waive the amount.

- It says the copy will be marked as lost.
- It lists the patron name and barcode.
- It includes the amount the patron will be charged. The fine amount is the Purchase Price from the copy record. If the purchase price is missing, the fine amount is the Max Fine from your Library Policies.
- It includes two buttons: OK and Cancel.
If you select OK, the copy will be marked as lost.
To mark a resource item stolen (Resource Manager only):
Click Stolen next to the item.
|
Note: You cannot mark items from other sites lost or stolen. |
Manage a patron's fines and fees
The Fines section lists all the patron's fines and refunds.
If you have several Destiny products, each fine is marked with the material type:
- LM for a fine on a library material
- TB for a textbook fine
- RM for a resource item fine
The Fees section lists district-assigned fees related to Resource Manager.
Fines/fees with a note icon ![]() have a note associated with them. Click Edit Fines or Edit Fees and then the edit icon
have a note associated with them. Click Edit Fines or Edit Fees and then the edit icon ![]() next to the fine/fee to see the contents of the note.
next to the fine/fee to see the contents of the note.
To change the amount due, waive, or pay any of the fines/fees, click Edit Fines or Edit Fees – or switch to the Circulation > Fines/Fees page.
To view the patron's detailed fine/fee history, click View History next to Fines or Fees.
To view the amount accrued to date for any overdue library materials, scroll down to Current Transactions and click View Estimate.
Review advance bookings
The Advance Bookings section lists a patron's pending or declined bookings.
| Note: When an item from a requested booking is checked out, it appears in the Items Out section. |
To edit the request dates, click ![]() , change the dates, and then click Save.
, change the dates, and then click Save.
To delete the request, click ![]() . A confirmation message appears,. Click Yes to delete the request.
. A confirmation message appears,. Click Yes to delete the request.
Manage a patron's library holds and reserves
The Holds section lists all the patron's current holds and reserves.
To create a new hold, click Add Hold or Edit Holds – or click Holds/ILL when the patron record appears.
To open the hold queue for a title, click the view icon ![]() next to that title.
next to that title.
To extend the expiration date of a hold:
|
Important: Closed calendar dates are not recognized by hold expiration dates. |
- Open the hold queue by clicking the view icon
 next to the appropriate title.
- Click the expiration date.
- Select the new expiration date from the calendar.
To change the priority of a hold:
- Open the hold queue by clicking the view icon next to the appropriate title.
- Select the new priority from the list.
- Click Save.
To delete a hold, open the hold queue, and click the delete icon ![]() .
.
If there is no status displayed for the title, the request is for an off-site copy or for a reserve that has not yet been approved. Once approved, the status appears.
If there is no hold queue (view ![]() ) icon for the title, the hold is for an off-site copy. For all interlibrary loans, the lending library's short site name appears in red in the Requested column.
) icon for the title, the hold is for an off-site copy. For all interlibrary loans, the lending library's short site name appears in red in the Requested column.
To check out a copy that you have received through an ILL, click ILL Checkout.
Manage a patron's district media bookings
In addition to current holds and reserves, the Holds section includes the patron's district media bookings.
To create a new booking, click Add Hold or Edit Holds – or click Holds/ILL when the patron record appears.
To change the date range for a booking, click the view icon ![]() next to the appropriate title. You cannot, however, change the date range for a Ready booking.
next to the appropriate title. You cannot, however, change the date range for a Ready booking.
To delete a booking, click the delete icon ![]() .
.
Review a patron's statistics
The Current Transactions and Library Circulation Statistics sections list the transaction summary information for the patron.
To view the estimated fine for any currently overdue library materials, click View Estimate.
Manage a patron's notes
The Notes section shows any notes that have been added to a patron record. For more on managing notes, see Use Notes.
Contact a patron or the parents
You can find the patron's street address, phone number, and email address under Contact Information.
If the email address is linked, click it to send the patron an email.
Manage a teacher's classes and textbooks
Under Currently Teaching is a teacher's class list and the number of textbooks checked out to the teacher and reassigned to students.
- To add or update classes for this or another teacher, click Update.
- To reassign textbooks that were checked out to this teacher but not yet reassigned to students, select a linked entry under Items Out. The Reassign Textbook page opens with a list of the available textbooks.
- To edit class information, click the edit icon
 .
.
- To transfer checkouts under Items Out/Assigned to another class, click the transfer icon
 .
.
- To generate a list of classes and the students' checkouts for those classes, generate a Class List from Textbook Reports in Reports.
|
Note: Resource Manager only. |
Print a patron's information
You can print the following information about a patron: Current checkouts, overdues, holds, reserves, and bookings; assessed fines; circulation statistics; and contact information. For teachers, the printout also includes class information.
- Select the options for including the patron's phone numbers, the titles or resource names on the list, or both.
- Click Printable at the bottom of the page.
- Use your browser's Print option.