Fines and Fees
The fine management features in Destiny make it easy to automatically assess, collect, and refund fines. Plus, you can manually adjust fines as needed.
Districts with Resource Manager can also create fees for things such as item usage or insurance at the district level, to assign to site patrons based on specified criteria. Site users with appropriate permissions can view history, add, edit, delete, and pay fees.
| Note:Fines and fees honor product-specific permissions, which determine the data you see on a page and in receipts. |

Add fines during checkin
You can use Library Manager
- On the checked in page, next to the copy you want, click Create Fine.
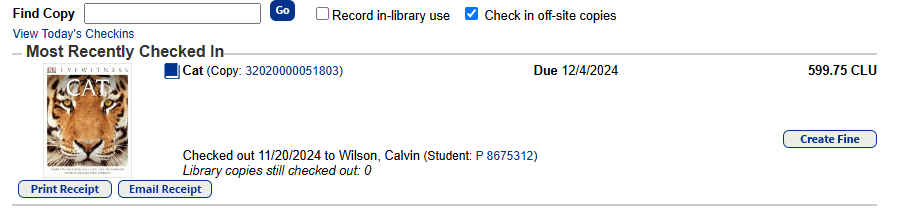
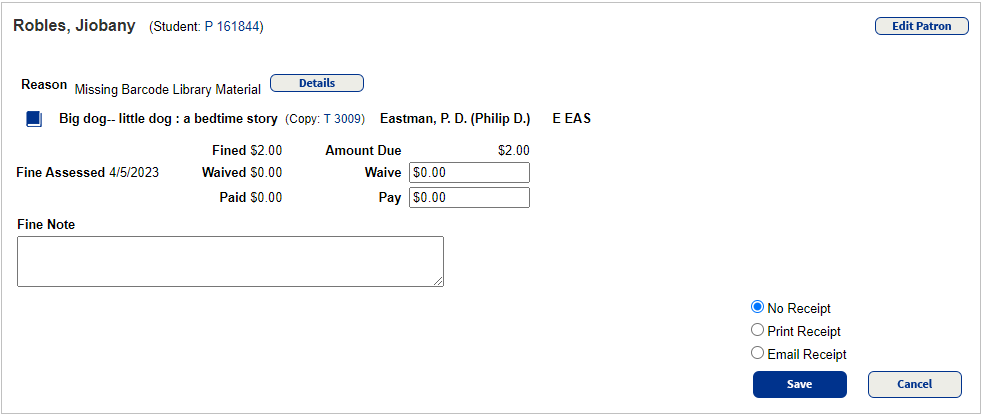
The Add Fine page appears.
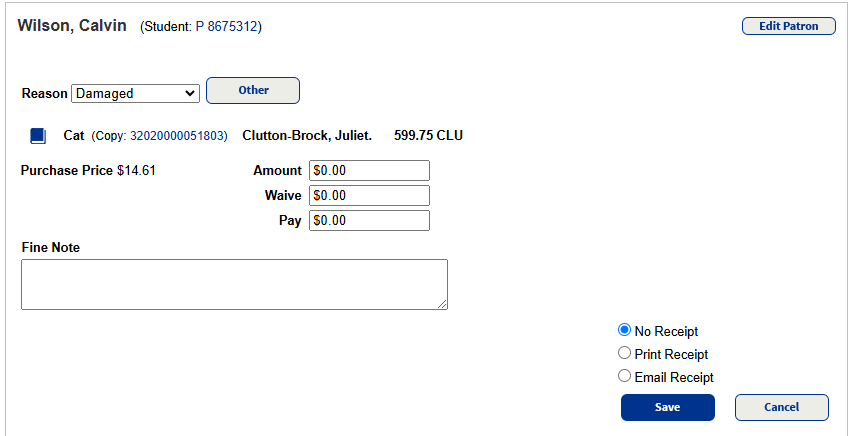
- Do any of the following:
- From the Reason drop-down, select the reason for fine.
Note: To add a new Fine Type, click Other and enter the fine type, copy or patron specific, and calculation method, then click Save. - Enter values in the Amount, Waive, and/or Pay fields.
- If you want to include a note, type it in the Fine Note field. The fine note appears on the Edit Fine page and in the patron’s Fine History.
- If you want to provide a receipt, do one of the following:
- To print a receipt, click Print Receipt to open a printable PDF.
- To email a receipt, click Email Receipt, and then select the email addresses to include.
- From the Reason drop-down, select the reason for fine.
- Click Save. If you are waiving part of the fine, a pop-up might appear. Enter the reason for the waiver, and then click Save.
Note: If you chose to print a receipt, the printable page appears.
To add a fine from the patron record:
- Select Circulation>Fines
- In the Find Patron field, scan or type a patron barcode or type a patron name.
- If you scan a barcode, the patron's information appears automatically.
- If you type the barcode or name, press Enter or click Go. If a list of patrons appears, select the one you want.
Note: Follett recommends searching by barcode to ensure you find the correct patron.
- Click Add Fine. The Add Fine page appears.
- Do any of the following:
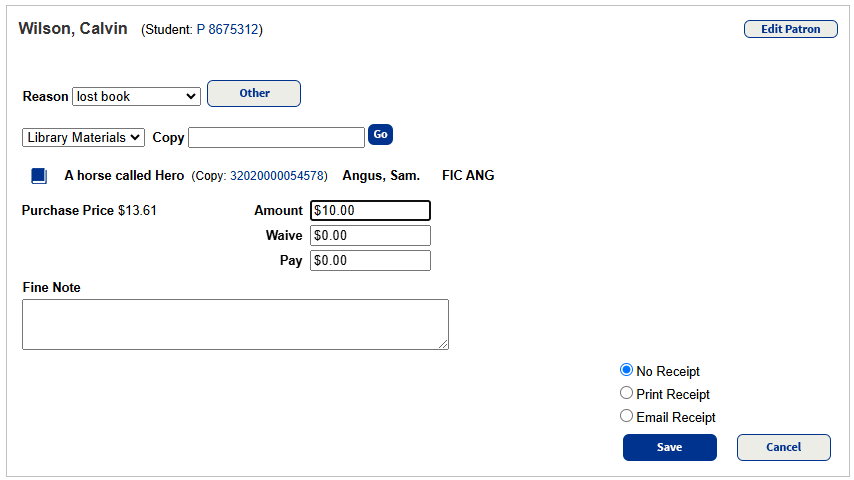
- From the Reason drop-down, select the reason for fine.
Note: To add a new Fine Type, click Other and enter the fine type, copy or patron specific, and calculation method, then click Save. - From the drop-down, select Library Materials
- Next to Copy
- Enter values in the Amount, Waive, and/or Pay fields.
- If you want to include a note, type it in the Fine Note field. The fine note appears on the Edit Fine page and in the patron’s Fine History.
- If you want to provide a receipt, do one of the following:
- To print a receipt, click Print Receipt to open a printable PDF.
- To email a receipt, click Email Receipt, and then select the email addresses to include.
- From the Reason drop-down, select the reason for fine.
- Click Save. If you are waiving part of the fine, a pop-up might appear. Enter the reason for the waiver, and then click Save.
Note: If you chose to print a receipt, the printable page appears.
Product-Related Details for Fines
- Library Manager: Destiny calculates overdue fine amounts based on patron and circulation types.
- Resource Manager/Textbook Manager: The fine amount for lost textbooks or resources is the replacement price or, if there is no replacement price in the title or resource record, the item's purchase price. For overdue items, the check-in staff enters the amount; this is dependent on the selections made in Site Configuration ( Admin > Site Configuration > Circulation).
Manage a patron's fines
- Select Circulation>Fines
- In the Find Patron field, scan or type a patron barcode or type a patron name.
- If you scan a barcode, the patron's information appears automatically.
- If you type the barcode or name, press Enter or click Go. If a list of patrons appears, select the one you want.
Note: Follett recommends searching by barcode to ensure you find the correct patron. The patron's Fines page appears.

- Next to the fine you want, do any of the following:
If you want to... Then... Edit a fine - Click
 .
. - Make changes accordingly.
- Click Save.
Waive a fine - Click .
- Next to Waive, enter the amount you want to waive.
- Click Save.
- Enter an explanation for waiving the fine.
- Click Save.
Enter a payment toward a specific fine - Click .
- Next to Pay, enter the amount you want to pay.
- Click Save.
- Enter an explanation for waiving the fine, and click Save.
Add or update a fine note - Click .
- In the Fine Note field, enter or update a note.
- Click Save.
Delete a fine Click  , and then click Yes in the confirmation pop-up.
 - Click
Accept fine payments
Library Manager
If your Destiny Administrator chooses to Allow fines to be paid/waived at any site
, you can pay, waive and issue refunds for off-site fines as well.
|
Note: You can only manage copy-specific fines for schools within your district. |
To enter a payment toward all fines:
- Select Circulation > Fines.
- In the Find Patron field, scan or type a patron barcode or type a patron name.
- If you scan a barcode, the Fines page opens automatically.
- If you type the barcode or name, press Enter or click Go. If a list of patrons appears, select the one you want.
- In the Pay field, enter a payment amount.
- If you want to provide a receipt, do one of the following:
- To print a receipt: Select Print Receipt.
- To email a receipt: Select Email Receipt, and then select the email addresses to include.
Notes:
- To customize receipts, see Set up receipts and refund notifications.
- To use the email features in Destiny, the Destiny Administrator needs to set up the SMTP mail server.
- If you want to print a receipt without entering a payment, click Print It. If the patron has outstanding fines, you will have the option to apply the refund to them.
- Click Update.
Note: If you chose to print a receipt, the printable page appears.
To enter a payment toward a specific fine:
- Select Circulation > Fines.
- In the Find Patron field, scan or type a patron barcode or type a patron name.
- If you scan a barcode, the Fines page opens automatically.
- If you type the barcode or name, press Enter or click Go. If a list of patrons appears, select the one you want.
- Next to the fine amount, click .
- In the Pay field, enter the amount paid.
- Click Save.
Work with fines
Follett recommends searching by barcode to ensure you find the correct patron.
|
Notes: If the replacement price in the description record is missing, the Purchase Price from the copy record is used as the fine amount. If neither price is in the record, no fine is charged. When a copy is marked Lost in Circulation > Copy Status or Item Status, the following message appears:
If you deselect the Automatically create fine for lost... checkbox, the following message appears instead:
In addition, the following actions create fines for checked-out copies:
You can always manually assess fines in Circulation > Fines. |
Work with fees
If fees were assigned at the district level, you can pay, add, delete, and waive them at your site.
| Note: Fee Management permissions are automatically enabled for the Administrator and Resource Administrator access levels. |
To work with fees:
- Select Circulation > Fines/Fees.
- To complete the task for active patrons, select the Only Active Patrons checkbox.
- In the Find Patron field, scan a patron's barcode or type their patron name or barcode, and then click Go.
- Select the patron you want.
- To add a new fee, click Add Fee or to edit a fee, click
 . See Add and edit fees.
 - To delete a fee, click . A confirmation message appears. Click Yes.
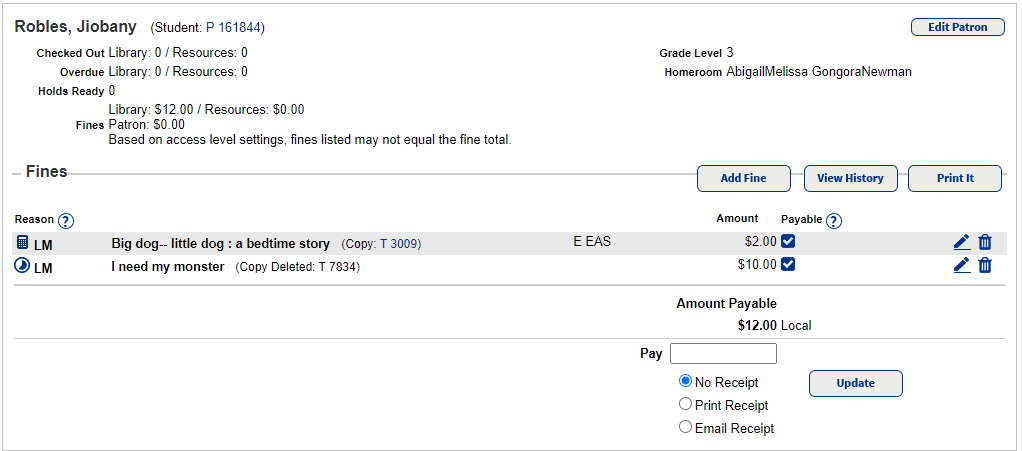
Total Amount Payable
Use the Amount Payable section at the bottom of the page to quickly pay fines or fees.
- In the Pay field, type the amount being paid.
- If you want to provide a receipt, do one of the following:
- To print a receipt: Click Print Receipt to open a printable PDF.
- To email a receipt: Click Email Receipt, and then select the email addresses to include.
- Click Update.
Other Functions
To view fine or fee history, in the applicable section, click View History. The Fine History or Fee History page shows the fine reason or fee name, when it was assigned, the amount, and the balance.
-
To see more information about the fine/fee, click Details.
-
To print a receipt that includes fines/fees, in the applicable section, click Print It.
-
To delete a fine or fee, click
.