Set up circulation receipts and refund notifications
Site Configuration receipts and refund notification options let you customize receipts for checking in library materials, resource items, and textbooks; checking out library materials, resource items, and textbooks; and making fine payments. And you can choose to notify a particular person, such as the finance clerk, when refunds are generated.
After a transaction, you can send an email receipt, and/or print a receipt to give to the patron.
|
Notes:
|
To set up circulation receipts:
Select Admin > Site Configuration > Receipts/Refund Notification sub-tab.
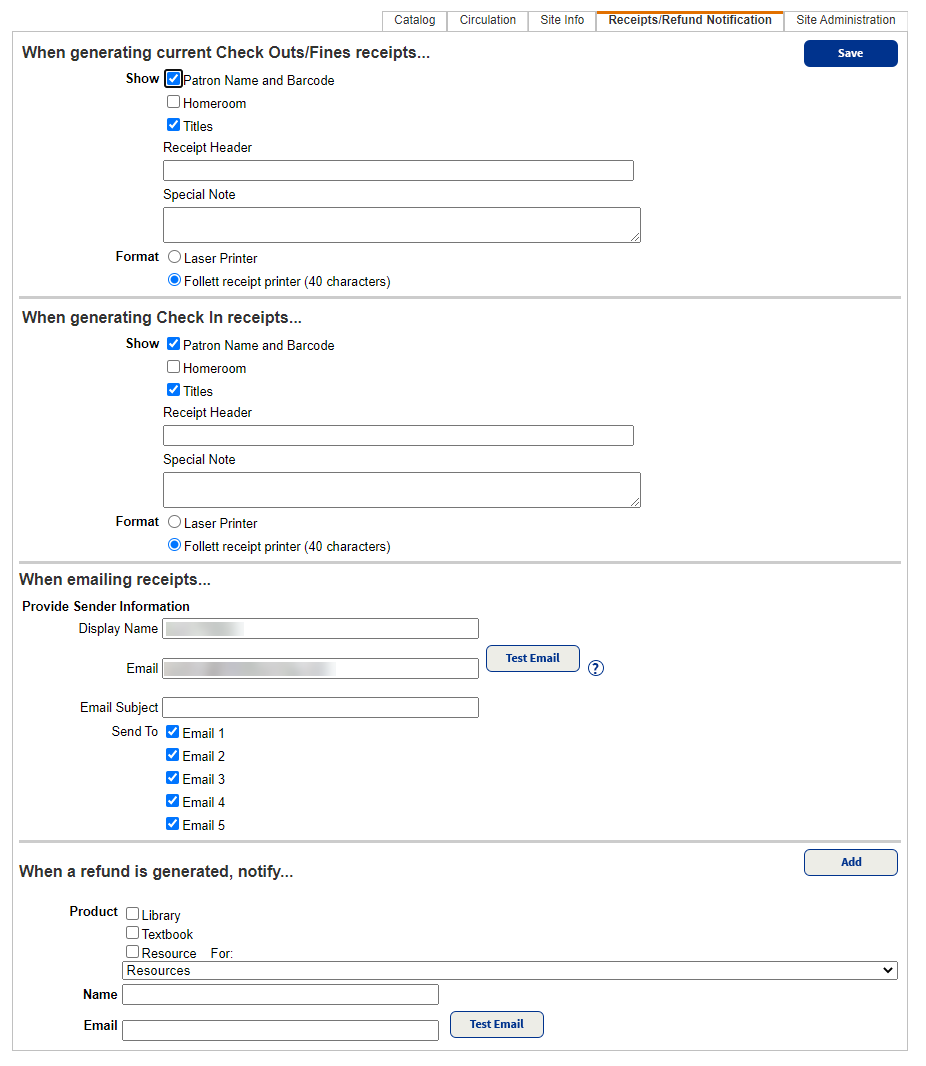
To set up printed checkout, check-in, or fines receipts:
- In the When generating current Check Outs/Fines receipts... and/or When generating current Check In receipts... sections, from the Show section, choose one or more options to appear on the receipt.
- Type a Receipt Header that will appear at the top of the printed receipt (max 38 characters) (optional).
- Type a Special Note that will appear at the bottom of the printed receipt (max 256 characters) (optional).
- Select a Format:
- Laser/ink jet printer to print an 8" × 11" receipt to a local or network printer.
- Follett receipt printer (40 characters) to print a 3" receipt to a Follett receipt printer.
Important: If you are printing to a Follett receipt printer, only the first 40 characters of a title appear.
- Click Save.
To email receipts:
- In the When emailing receipts... section, provide the sender information:
- In the Display Name field, type the name of the person sending the notification, such as the librarian.
- In the Email field, type the return email.
- Type an Email Subject.
- Next to Send To, choose one or more emails to send the message to.
- Click Save.
To set up refund notifications:
- In the When a refund is generated, notify... section, select the Destiny Product the receipt reflects.
- If you chose Resource, use the For drop-down to select the specific resource type the person manages.
- Type the Name of the person who will receive the notification, such as the finance clerk.
- Type that person's Email.
- To verify the email, click Test Email.
- When you are done, click Add. The new refund notification appears in the Currently configured email... section.
- Click Save.