Use the Batch Delete sub-tab
Batch Delete lets you delete a group of copies using a file of barcode numbers.
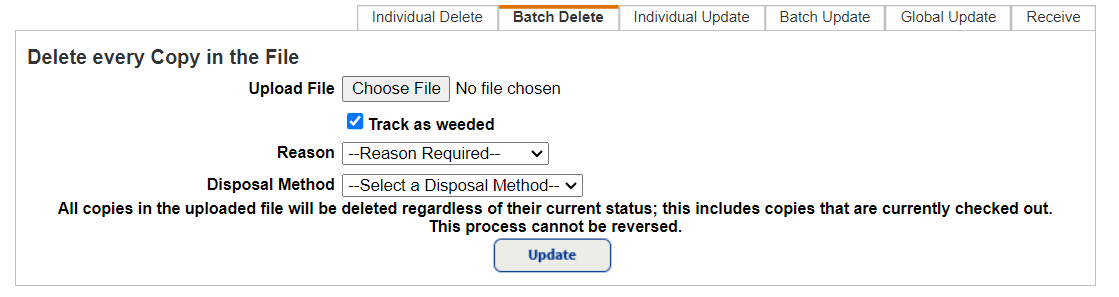
To delete copies using a barcode file:
- Create and save a text file listing the barcodes of the copies to be deleted. Alternatively, collect the barcode scans with a Follett wireless handheld device, and then transfer the scan file to your workstation.
- Select Catalog > Update Copies > Batch Delete sub-tab.
- If you manage library materials for your district, use the From drop-down to select the school that owns the copies to be deleted.

- If you manage both your library materials and textbooks in Destiny, choose the type from the File Contains list.
- Click Browse (or Choose File, depending on your browser) to locate the Scan.Log or text file.
- If you do not want deleted copies added to the Weeding Log, deselect the Track as weeded checkbox.
- If your district tracks a reason and disposal method for weeded materials (Library Manager only):
- From the Reason drop-down, select a reason for deletion.
- From the Disposal Method drop-down, select a method.
Note: If these options are disabled, they do not appear. Your district sets whether they are required or optional.
- To delete the copies, click Update and then Yes on the confirmation message.
When the delete process ends, Destiny produces a report that lists each copy deleted or skipped, and the reason. To view the report, select it in Admin > Job Manager.