Generate a Weeding Log
Whenever you remove materials from your catalog, Destiny collects and stores information about those copies. The Weeding Log gives you a list, grouped by the date copies were weeded, deleted, or transferred.
To generate the report:
- Select Reports > Library Reports.
- Under Catalog -- Titles & Copies, click Weeding Log.
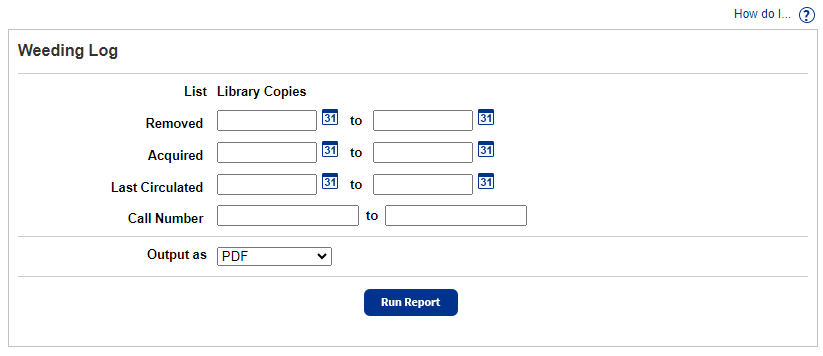
- Do any of the following:
Note: The Acquired, Last Circulated, and Call Number fields are only available in Library Manager.
- In the Removed, Acquired, or Last Circulated fields, enter a range of dates.
Note:
You can limit to one date or a range.
- All dates: Leave both fields blank.
- One date: Enter the same date in both fields.
- On or before a specific date: Leave the From field blank, and enter a date in the to field.
- On or after a specific date: Enter a date in the From field, and leave the to field blank.
- In the Call Number fields, enter a call number range.
Note:
You can limit to one call number or a range.
- All call numbers: Leave both fields blank.
- One call number: Enter the same call number in both fields.
- On or before a specific call number: Leave the From field blank, and enter a call number in the to field.
- On or after a specific call number: Enter a call number in the From field, and leave the to field blank.
- In the Removed, Acquired, or Last Circulated fields, enter a range of dates.
- If you are a district user, select the district, a group of sites, or an individual site from the For drop-down.

- From the Output as drop-down, select PDF or Microsoft Excel.
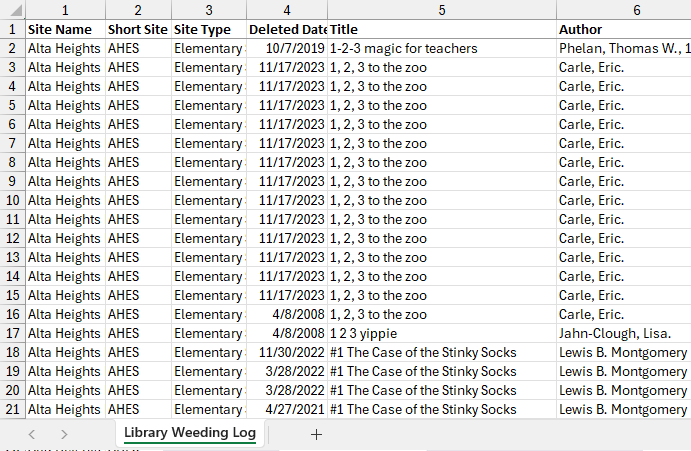
Note: If you want to see the Site Name, Site Short Name, and Site Type, select Microsoft Excel. The PDF does not include this information.
- Click Run Report.
- When Report Manager opens, click View to see the report.
Report Contents
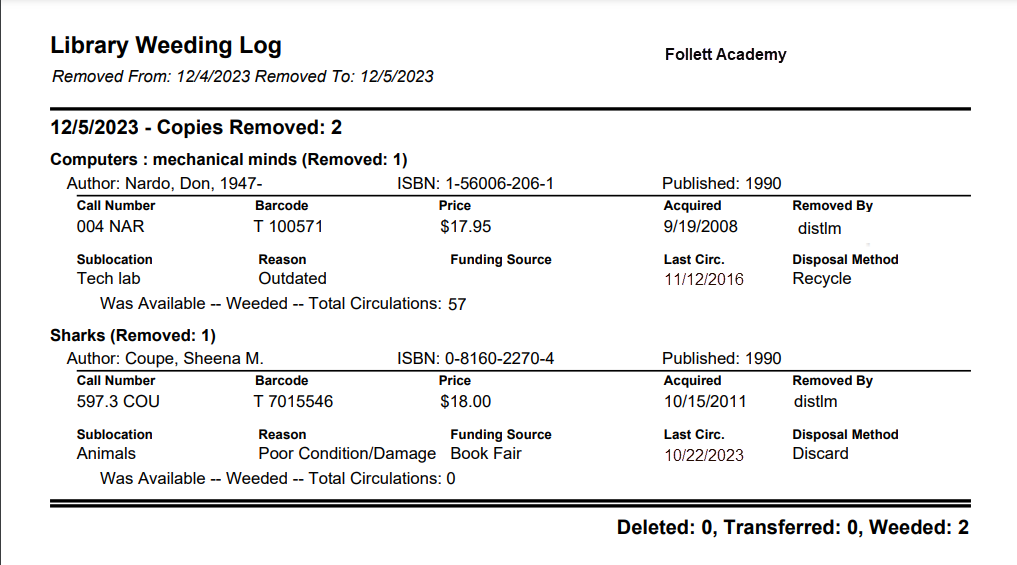
The report groups the information by date and includes the number of copies weeded each day.
For each included copy, the report includes the following information.
Title Record:
- Title
- Number of copies removed
- Author
- Standard number
- Publication date
Copy Record:
- Call Number (Library Managerand Media Manager only),
Location (Textbook Manageronly) or
Site name (if the report was generated by a district user) - Copy barcode number
- Purchase price
- Condition (Textbook Manager only)
- Acquisition date
- Username of the person who removed it
- Sublocation (Library Manager only)
- Reason (Library Manager only)
- Funding Source (Library Manager only)
- Last circulated (Library Manager only)
- Disposal Method (Library Manager only)
- Copy status at the time of removal
Site Information:
- Site Name (Excel only)
- Site Short Name (Excel only)
- Site Type (Excel only)
Report Totals:
- Total number of copies removed
- Number of copies deleted
- Number of copies weeded
- Number of copies transferred (if the report is generated at a site)
Sort Order
The report is sorted and grouped by the date weeded, with the most recent date first. It is secondarily sorted by title, then author.
If multiple copies of a particular title were removed, they are sorted by Call Number (Library Managerand Media Manager) or Location (Textbook Manager), and then by Copy Status.
Difference Between Weeded, Deleted, and Transferred
The report differentiates between the methods used to remove the copies.
Weeded: These are copies deleted on any of the pages in the Catalog, listed below, with the Track as weeded checkbox selected in the confirmation message. Destiny assumes that you had the book in hand or had scanned the barcode, having pulled it from the shelves.
- Title Details or Textbook Details when deleting the copy by clicking Delete.
- Title Details when deleting the title (and thus, all its copies) by clicking Delete Title.
- Update Copies > Individual Delete.
- Update Copies > Batch Delete.
When you delete titles/copies as part of an export, they are tracked as weeded.
Deleted: These are copies deleted on any of the pages listed below. They include transferred copies that never arrived, copies exported in bulk, and lost copies deleted in Admin > Inventory. It does not include copies lost by patrons.
- Title Details when deleting the title (and thus, all its copies) by clicking Delete Title and not selecting the Track as weeded checkbox in the confirmation message.
- Catalog > Update Copies > Receive (Library Manager only) when clicking Delete Copy.
- Catalog > Export Titles or Export Textbooks when selecting to delete the titles and copies after export.
- Catalog > Transfer Textbooks (Textbook Manageronly) when another school uploaded a transfer and then stopped it.
- The Lost Copies list in Admin > Inventory when clicking Delete.
Transferred: These are copies sent to another school within the district. Transfers appear on the report for the school that sent the copies to the other school. On a district-wide report, however, these copies do not appear because they remain in the district.
Report Uses
View this log when ordering replacement materials, creating budgets and year-end reports, or when accounting for materials or funds spent.
If you need to weed your collection, a Title & Copy List report can help. You can limit the report to just the copies that have not circulated in a while.
- Choose a Show Titles option that includes copies.
- Select the Circulation statistics and Only show copies that circulated checkboxes.
- Limit the statistics to Less than 1 time(s) This year.
To view the checkout history for any particular copy, retrieve it in Circulation > Copy Status.