Create a customized district Welcome page
A customized Welcome page can serve as a dynamic resource to welcome users to your district and highlight available resources.
The Destiny Administrator can add introductory text, images, and links.
|
Notes: |
By customizing the district Welcome page, large districts can allow users to search or browse to a school’s link on that page.
| Customized Welcome page | Non-customized Welcome Page |
|---|---|
|
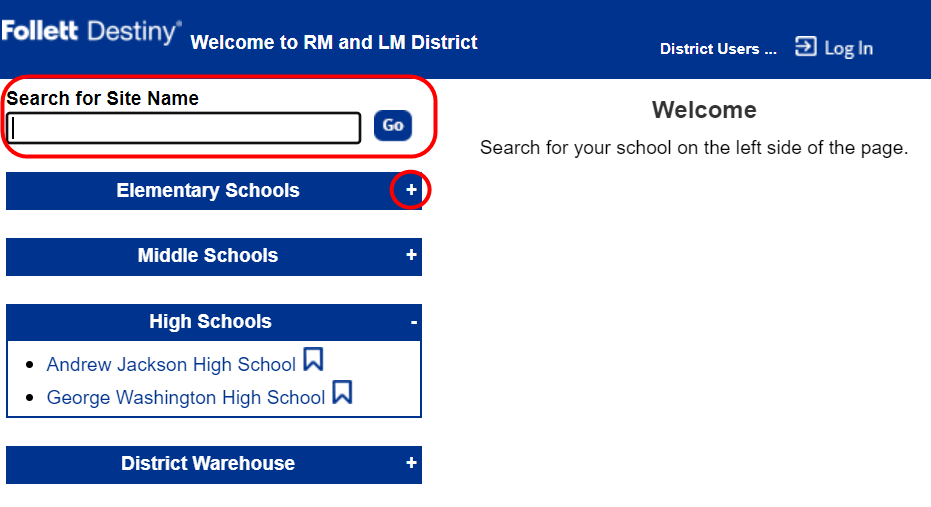
When the page is displayed to all users, a field lets users search for a site or expand site types.
|
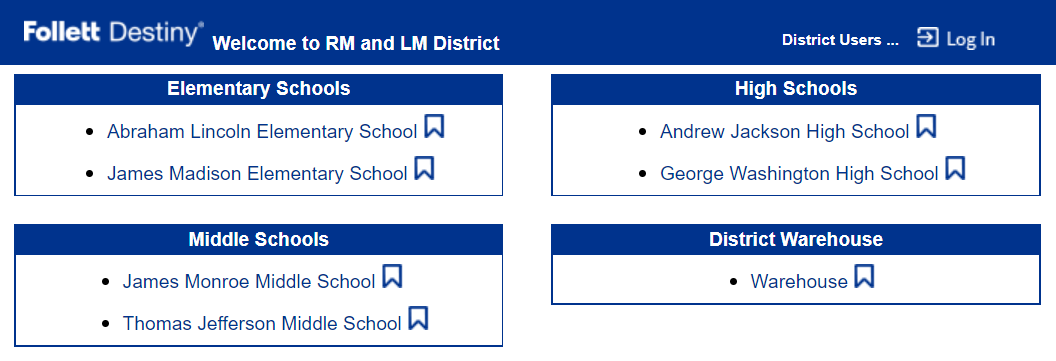
Without the district Welcome page customized, all sites appear on the page.
|
To customize the Welcome Page:
- Log in as a Destiny Administrator.
- Select Setup > Sites sub-tab.
- Next to your district name, click
 .
.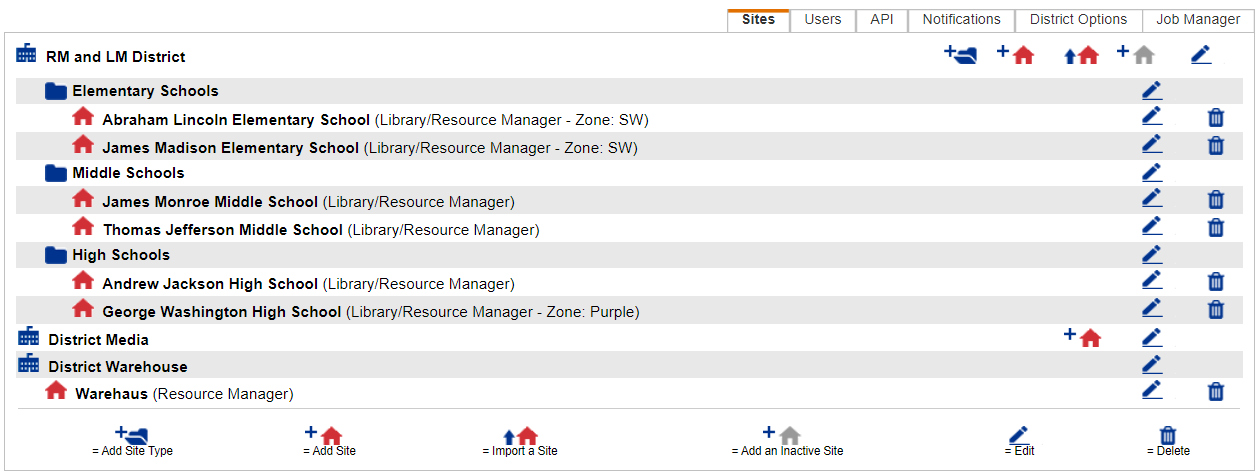
- Scroll to the Customized Welcome Page section at the bottom of the page, and then click Edit Page.

Note: You can either have a standard Welcome page or a customized Welcome page. You cannot use the Image for Standard Welcome Page section (located at the bottom of the page) to add images to a customized district Welcome page.
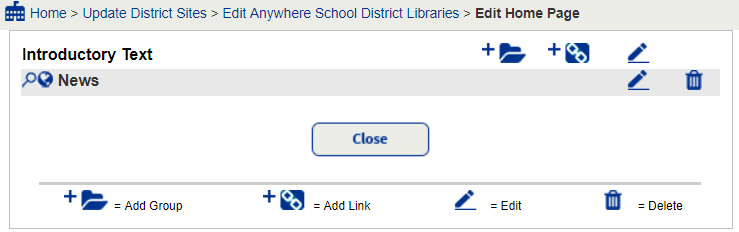
- To add text and HTML content to the Welcome page, next to Introductory Text, click .
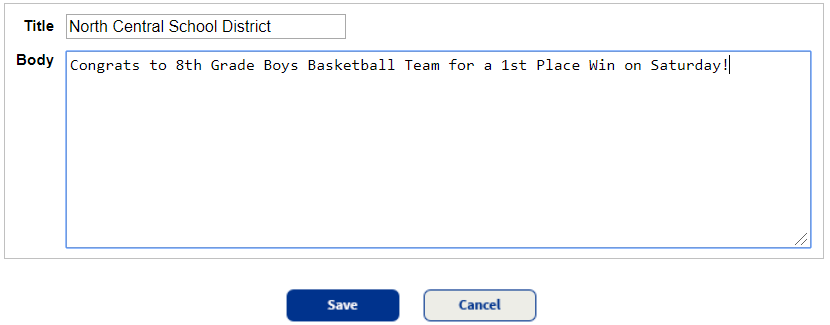
- In the Title field, type a title in plain text.
- In the Body field, type plain text or HTML.
Notes:
- The text and HTML content appear at the top of the Welcome page, above any groups of links.
- Plain text will appear as plain text on the district’s Welcome page. You must use HTML to format text.
- Destiny does not use spell check, so review your text before saving.
- To add an image (for self-hosted customers only):
- In the \FSC-Destiny\fsc\districtResources\images directory, create a \welcomepage folder.
- Add a graphic file, such as picture.jpg, to the folder.
- At Introductory Text, to point to the file, add HTML such as: <img src=”/imagestore/welcomepage/picture.jpg”>.
Note: Make sure to use “/imagestore” and not “/images”.
- Click Save.
Create a group
Groups are a great way to organize lists of URLs so your patrons can quickly and easily find the one they want. For example, you can create a group called School Websites, and list the URL of the website of each school in your district.
To create a group:
- Log in as a Destiny Administrator.
- Select Setup > Sites sub-tab.
- Next to your district name, click .
- Scroll to the Customized Welcome Page section, and then click Edit Page.
- Next to Introductory Text, click
 .
. - Type the group name and sort order.
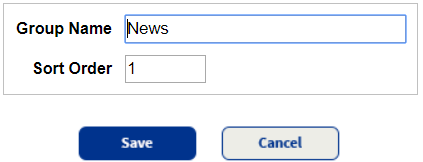
- Click Save.
Repeat these steps for each desired group, and then add links.
To add links to a group:
- Next to Introductory Text, click
 .
. - In the Display Text field, type the text you want to appear on your Welcome page.
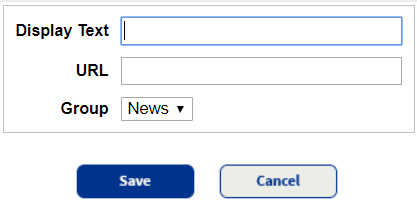
- In the URL field, enter the URL.
- In the Group drop-down, select the group the link will be added to.
- Click Save.
|
Note: Links appear in alphabetical order within a group. |
When you are finished customizing the Welcome page, creating groups, and adding links to groups, click Close.
Publish the customized district Welcome page
Once you finish customizing your district’s Welcome page, you need to let your users see it.
- In the Customized Welcome Page section of the Edit District page, select the Display to all users checkbox. By default, this is not selected.
- Click Save.