Add, edit, duplicate, and waive fees for the district
District users with the Manage Resources for the District or Manage Patrons for the District permission can create, edit, duplicate, and waive fees assigned to patrons throughout the district.
When fees are created, the district user can assign fees to groups of patrons based on patron type, persona, or status. Site users with the appropriate permissions can view, add, pay, waive, and delete district-created fees for their individual patrons.
To create a fee:
- Log in as a district user.
- Based on how Destiny is set up at your district, do one of the following:
- Select
 > District Back Office.
 - From the top-right corner, click District.
- Select
- Select Admin > Manage Fees.
- To add a new fee, click Add Fee.
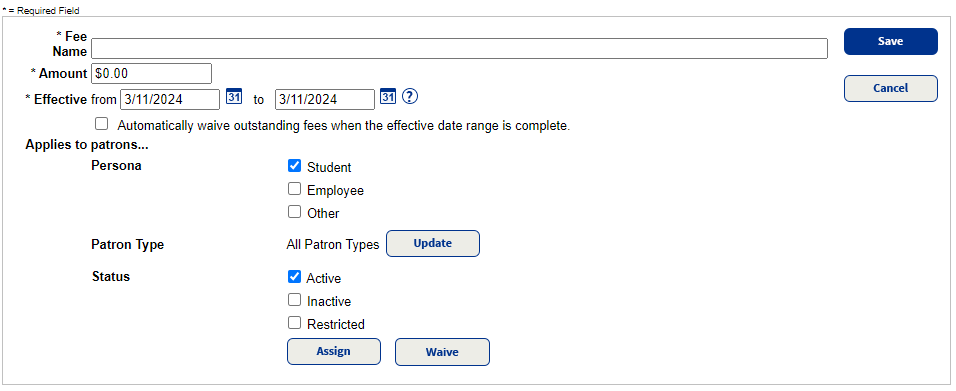 W
W - Enter a Fee Name.
- Use the Amount field to enter the charge.
- Type dates in the Effective from and to fields, or add them with
 .
. - To waive fees when the effective date ends, select Automatically waive outstanding fees when the effective date range is complete.
- In the Applies to patrons section, limit by any of the following:
- Persona
- Patron Type
- To select specific patron types, click Update to make your selections.
- Click OK.
- Status
- Resource Type
- To select specific resource types, click Update to make your selections.
- Click OK.
- To block a checkout to a patron if they have any outstanding fees linked to the selected resource types, select Block checkout if fee is unpaid.
- Do one of the following:
- To save the fee and assign it later, click Save.
Note: Site users with the appropriate permissions can see and add the saved fees to their individual patrons.
- To assign fees now, click Assign. The Job Manager appears.
- When the status is Completed, click View.
- The Job Summary shows the following:
- Number of patrons matching your selection, patrons already with the fee, patrons assigned the fee, and number of errors.
- The patron assigned the fee, their barcode, site association, and patron type.
- To save the fee and assign it later, click Save.
Patrons with multiple site associations will be charged one time at their primary site.
To edit or duplicate a fee:
- Log in as a district user.
- Based on how Destiny is set up at your district, do one of the following:
- Select > District Back Office.
- From the top-right corner, click District.
- Select
- Select Admin > Manage Fees.
- Next to the fee to edit, click
 or to duplicate, click
  .
. - Make necessary changes.
- Do one of the following:
- To save the fee and assign it later, click Save.
- To assign fees now, click Assign. The Job Manager appears.
- When the Status is Completed, click View.
- The Job Summary shows the following:
- Number of patrons matching your selection, patrons already with the fee, patrons assigned the fee, and number of errors.
- The patron assigned the fee, their barcode, site association, and patron type.
Waive fees manually
- Log in as a district user.
- Based on how Destiny is set up at your district, do one of the following:
- Select > District Back Office.
- From the top-right corner, click District.
- Select
- Select Admin > Manage Fees.
- Next to the fee to waive, click .
- Click Waive.
- In the confirmation message, click Yes.