Create an access level
Some access levels and permissions are set up during Destiny installation.
|
Note: A Destiny Administrator can manage and create access levels for the district or assign a user the Product Access Levels permission, which lets them see and set the rights for other users of the selected product. |
To create an access level from the site:
- Select Admin > Access Levels.
- Click Add Access Level. The Add Access Level page appears.
- In the Access Level field, type a name for this access level.
- For each permission you want this new access level to have, select the applicable checkboxes.
- (Optional) If you want to edit access to a resource group, use the Resources sub-tab (Resource Manager).
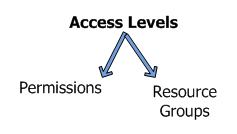
This illustration shows the relationship between access levels, permissions and resource groups:

- When you are done selecting permissions for the new access level, click Save.
The access level you created appears on the Access Levels page.
- See Define Access Levels (District) for steps a Destiny Administrator can use to create an access level from the district.
- See the Security Setup training materials for Library Manager or Resource Manager for more details on permissions and access levels.