Manage Item Categories
|
Note: In Resource Manager, you can only access the resources you have permission to view. |
Item Categories let you group your items for many different purposes. These include tracking vendors and funding sources, and collecting items for stocking classrooms or labs.
|
Notes:
|
Use Item Categories when you:
- Import resources
- Transfer resources
- Update individual, batch, or global resources
- Create reports
- Create Resource Lists
- Because you can add the contents of an Item Category to a Resource List (and vice versa), you can take advantage of all the uses for the lists. These include publishing or emailing the List, transferring the items, and updating the items in Update Resources.
Note: A Resource List helps you manage the resource records and includes all their items, while an Item Category contains certain items and their associated resource records.
- Because you can add the contents of an Item Category to a Resource List (and vice versa), you can take advantage of all the uses for the lists. These include publishing or emailing the List, transferring the items, and updating the items in Update Resources.
Create a Category
- Select Catalog > Resource Search > Item Categories sub-tab.
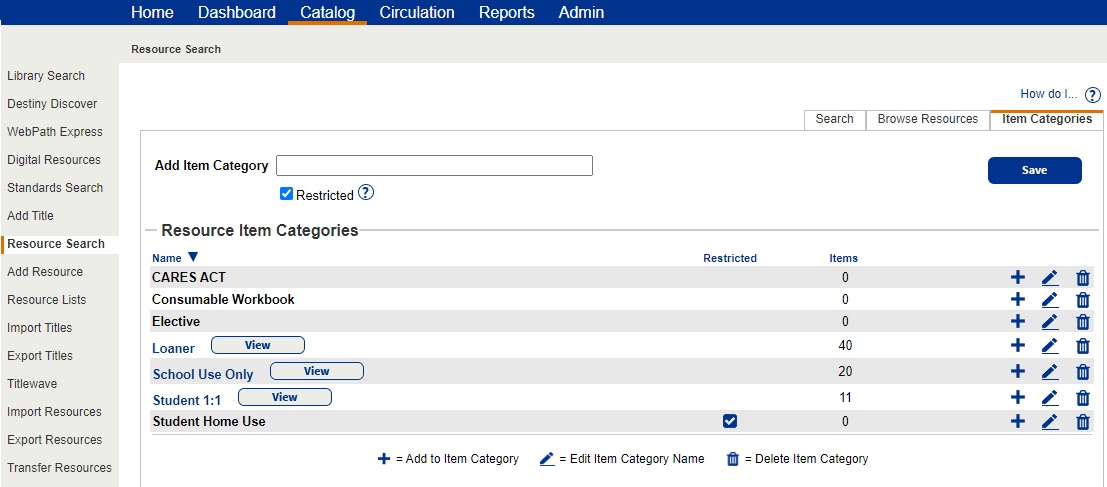
- In the Add Item Category field, enter a unique name of up to 30 characters.
- If you want other users to have access to this category, deselect the Restricted checkbox.
- Click Save.
The item category appears in the Resource Item Categories section. Do any of the following:
- To sort the list, click any column heading. Click again to invert the order.
- To view the contents of a category, click View.
- To assign items to a category, click the plus icon.
- To change the name of the category or restrict its viewing, click the edit icon.
- To delete a category, click the delete icon.
You can also create categories when adding or editing item records.
Assign Items to a Category
You can assign items to categories in any of the following ways:
- From the Item Categories sub-tab, click the Add to Item Category (
 ) icon next to a category.
- From the Item Categories sub-tab, view a category, and on the Search Results page, click + to This Category.
- When adding or editing item records.
- When duplicating an existing item.
Remove Items from a Category
- Select Catalog > Resource Search > Item Categories sub-tab.
- Click View next to the category.
- On the Search Results page, click Show More beneath the resource name.
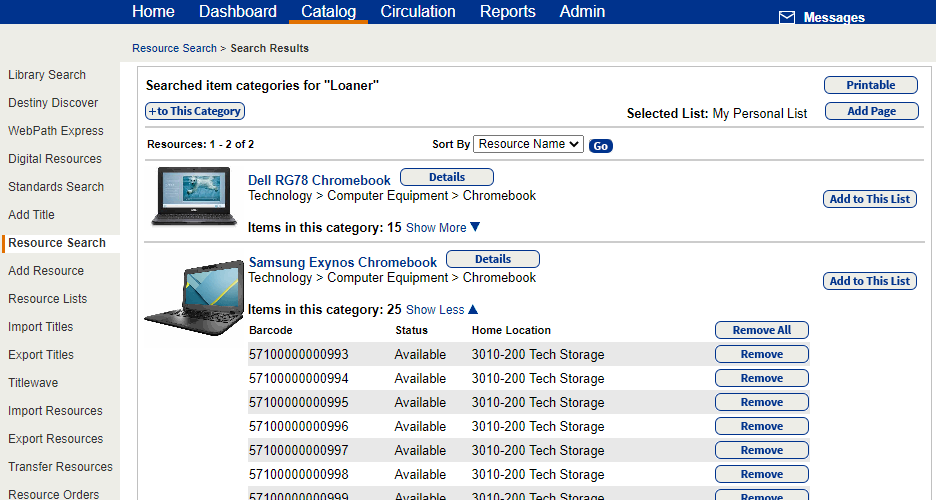
Note: This resource may have additional items that are not in this category. To view all the resource's items, click Details and then See all …. - To remove all of this resource's items from the category, click Remove all. To remove a particular item, click Remove.
| Note: You can delete a category to remove all the items. From Catalog > Resource Search > Item Categories sub-tab, click the delete icon next to the category, and then Yes on the confirmation message. Destiny first removes the category from the item records, and then deletes the category itself. |
Add a Category to a Resource List
If desired, you can add a category list to a Resource List.
- Select Catalog > Resource Search > Item Categories sub-tab.
- Next to the category, click View.
- Verify that the correct Resource List appears next to Selected List.
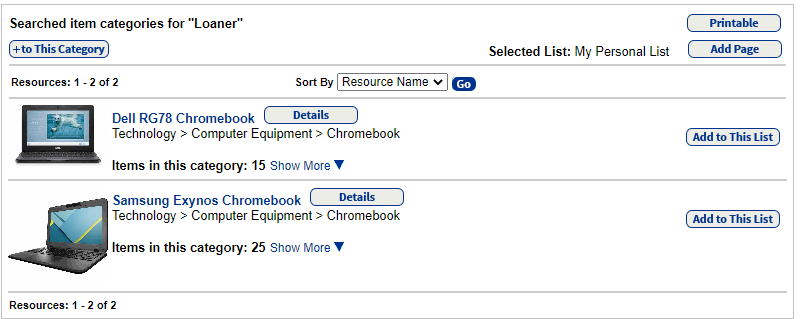
- To add all the resources and all their items, click Add Page.
To add an individual resource and all its items, click its Add to This List.