Map fields
District- and site-level users can import data into a single resource type using a CSV or XLSX file. When the file and appropriate resource type are selected (Catalog > Import Resources > Add/Update sub-tab), the Map Fields page shows all the fields available for the selected resource type.
|
Note: At this time, you cannot map fields from a CSV or XLSX file to import for textbooks. |
To map fields:
- If the first row in your file defines each column, skip it by selecting the First row contains header information and will be skipped checkbox.
- At each drop-down, select the column from your file that associates to the General Resource Description Fields and Item - Specific Fields.
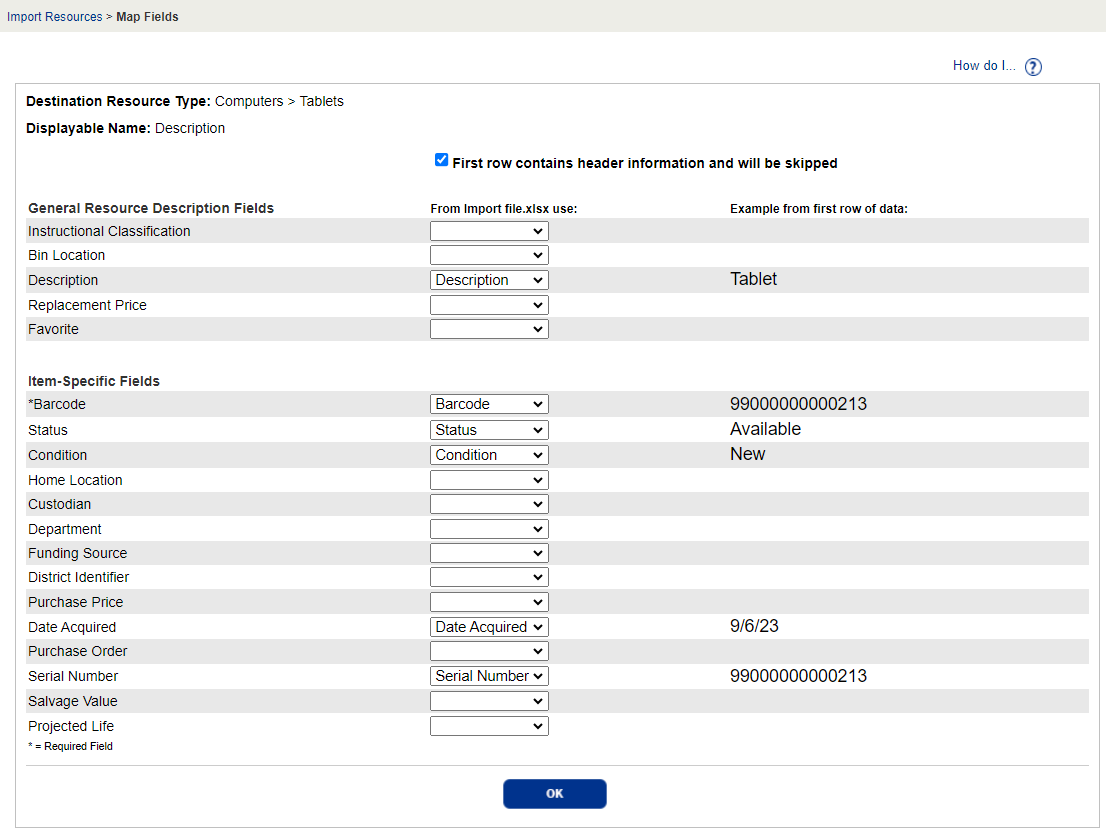
Notes:
- If you skipped the header row, the column names appear in the drop-downs; otherwise, you will see Column A, Column B, etc..
- The Displayable Name field(s) listed at the top of the page are required.
- The Site drop-down only appears when importing at the district-level and is a required field. Use either the Site Short Name or Alias in your import file.
- When you are done mapping all the fields, click OK. The Import Resources page appears.
- To check the results before importing, click Preview.
Note: The Preview function reads the incoming records, compares them to the existing records, and generates a Job Summary – but does not actually import the records. After the preview, you can look over the report and decide whether your import settings need any adjustment. - When the Job Manager page appears, click View to see the Job Summary.
- If there are errors, fix them and repeat this process. When no errors show, click Import.