Associate a patron with your site
Districts often share more than just resources; they also share personnel. In addition, students may attend classes at more than one school. Although each user, referred to as a patron, is assigned a primary site, Destiny can associate them with multiple schools across the district.
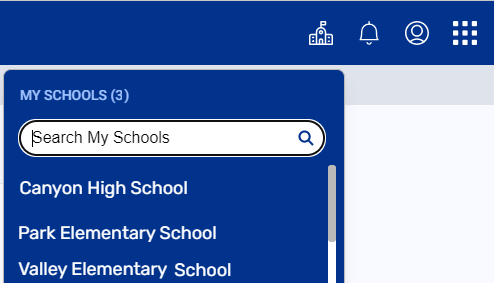
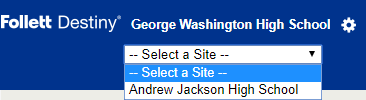
Patrons associated with more than one site will see either ![]() or
or ![]() in the header, depending on the setup at your district.
in the header, depending on the setup at your district.
Based on your permissions, you may see ![]() next to the primary site of patrons associated with more than one site. Users with Add/Edit patrons permission can edit patrons associated with their school. A District Patrons Manager or users with the Search for patrons across the district permission can add a site association to patrons of other sites.
next to the primary site of patrons associated with more than one site. Users with Add/Edit patrons permission can edit patrons associated with their school. A District Patrons Manager or users with the Search for patrons across the district permission can add a site association to patrons of other sites.
To view all sites associated with and add a patron to your site:
- Select Admin > Manage Patrons.
Note: If you are logging in as a district user, select either  > District Back Office in the middle of the header or District in the right corner, and then Admin > Manage Patrons (based on how Destiny is set up at your district).
 - To see patrons not currently associated with your site, select the Search across the district checkbox.
- In the Find field, scan or type the patron’s barcode number, or type a keyword (such as a patron’s name).
- Press Enter, or click Search.
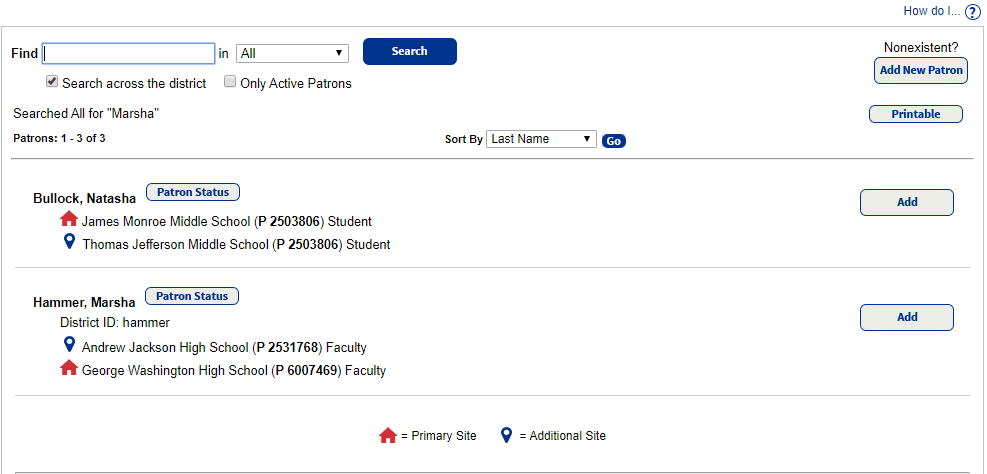
Note: If a patron is deleted from their primary school, the school with the oldest secondary association becomes the patron’s new primary school. You can only edit and delete patrons associated with your school. A District Patrons Manager, however, can globally add and remove site associations. - Next to the patron you want to associate with your site, click Add.
- On the General sub-tab, assign a barcode number, and add or update information.
- Make sure the Patron Type and Access Level are appropriate for your school.
- To create the association, click Save.
To associate a patron with additional sites as a district user:
- Log in to Destiny as a district user.
- Select Admin > Manage Patrons.
- In the Find field, scan or type the patron’s barcode number, or type a keyword (such as a patron’s name).
- Press Enter, or click Search.
- Next to the patron you want to associate with additional sites, click Edit.
- On the General sub-tab, type the patron's existing password in the Confirm Password field or type a new password in the New Password and Confirm Password fields.
- Click + Additional Site.
Note: This button only shows if you have the Manage Patrons for the District permission. 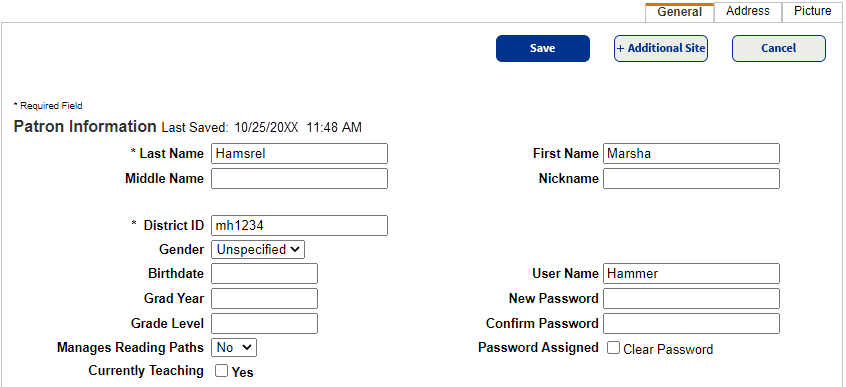
- From the site drop-down, choose the site to add.
- If this should be the primary site, select Make Primary Site.
- Assign a barcode number, and add or update other fields.
- Make sure the Patron Type and Access Level are appropriate for your school.
- To create the association, click Save.
To switch between sites:
Patrons associated with more than one site can switch sites. Depending on the setup at your district, do one of the following:
| enabled | not enabled |
|---|---|
|
|
|
Note: The patron is automatically logged in to the desired site. |