Create a container (Resource Manager)
District resource managers can designate a resource as a "container" so it can include other items. This allows sites to circulate the container without individually checking out and checking in all of its included items.
To designate a new resource as a container:
- Log in to Destiny as a district user.
- Select Catalog > Add Resource.

- From the Find all drop-down, select the resource type.
- Use the Where Resource Name drop-down to select one of the following:
- Contains: Performs a keyword search for one or more words that are part of the Resource Displayable Name. This is the broadest search.
- Starts With: Searches for resources that begin with the letters or words you enter. Select this option only when you know the resource’s exact name.
- Type your search term.
- Click Go. The Add Resource page appears.
- In the Resource Type drop-down, confirm the correct resource type is shown.
- Complete all required fields and as many other fields as possible.
- Select the Includes other items checkbox.
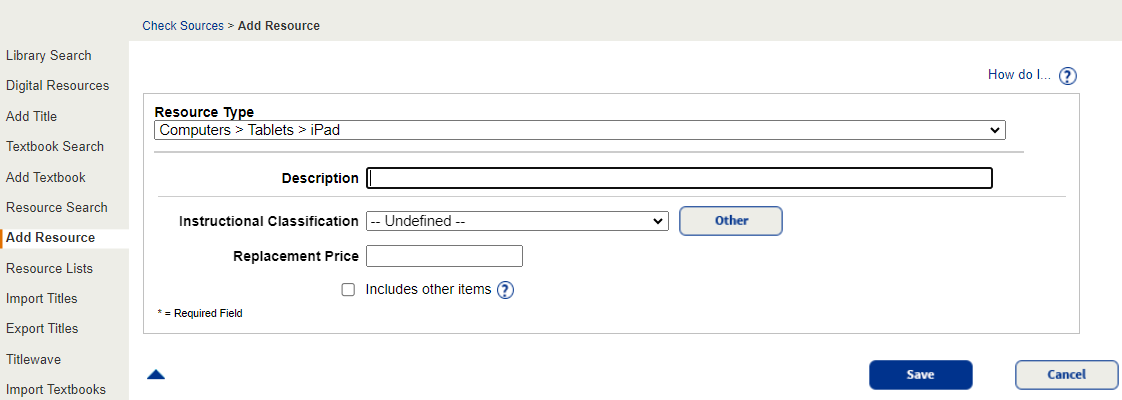
- Click Save.
- To continue, click Yes to confirm that you want the resource to include other items.
The resource is now defined as a container. Add a barcoded item, which becomes the "parent". All included items are the "children".
To add the parent to the newly created resource:
- On the Resource Details sub-tab, click Add Item.
- In the Starting Barcode field, either enter a number or select Assign next barcode.
- Complete all required fields and as many other fields as possible.
Note: Reports are more accurate and useful if most fields are completed.
- Click Save.
A district or site user can now include items in the container.