Schedule an import (Resource Manager)
Use Scheduled Import Resources to define when you want Destiny to automatically import new or updated resource and item records.
To schedule an import:
- Log in to Destiny as a district user.
- Based on how Destiny is set up at your district, do one of the following:
- Select
 > District Back Office.
 - From the top-right corner, click District.
- Select
- Select Catalog > Import Resources > Schedule sub-tab.
- Click Schedule It. The Scheduled Import Resources page opens.
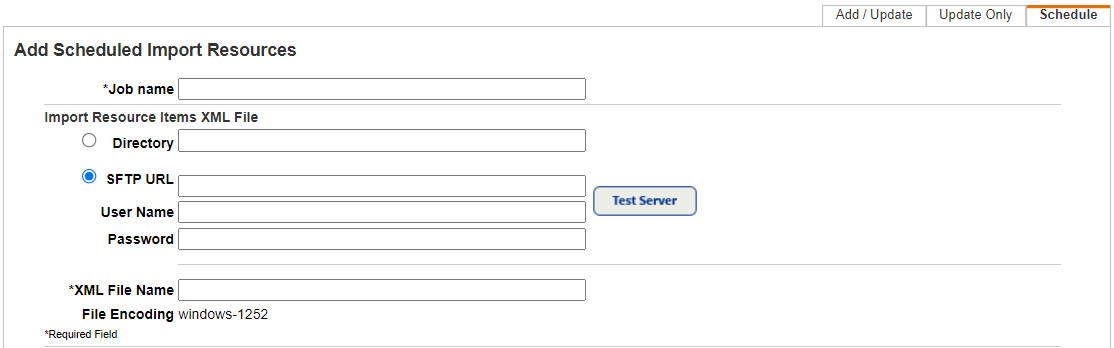
- Enter a unique name in the Job name field.
- Select either Server directory or SFTP URL. Use the following table to complete the fields:
If you selected... Then... Server directory Enter the location of the XML file. The location you enter must be accessible to the Destiny application server as a local hard drive and folder, mapped network drive and folder, or UNC path. SFTP URL Note: The SFTP fields are case-sensitive. To validate the connection to the server is successful, click Test Server. - Enter the server name and any subfolders where the XML file exists in the SFTP URL field.
- Enter the user name configured to access the server and folder in the User Name field.
- In the Password field, enter the password for the user name.
- In the XML File Name field, enter the name of the resource import file.
- In the Job Schedule section, select the day and time for the update.
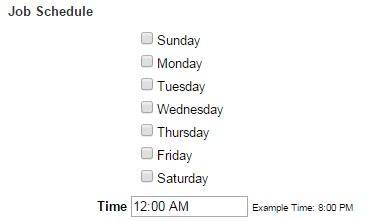
Note: Consult with your Destiny Administrator to make sure the date and time do not conflict with other server activity, such as Destiny backups or maintenance tasks. - In the Resource Matching section, select if you want Destiny to skip incoming resources that match an existing resource, or overwrite the existing resource.
-
Select... If... Skip the incoming item if it matches an existing item based on the resource identifier defined in your file (district identifier or barcode) The file contains barcode numbers. Overwrite the existing item with the incoming item if the resource identifier defined in the file (district identifier or barcode) and the displayable resource name match Updating resources in Destiny with information from your data file, such as adding serial numbers to items. Always add the incoming item record and assign it the next available barcode Your file does not contain barcodes. You can decide whether to have Destiny assign barcodes to the imported resource items, or to enter a starting barcode. 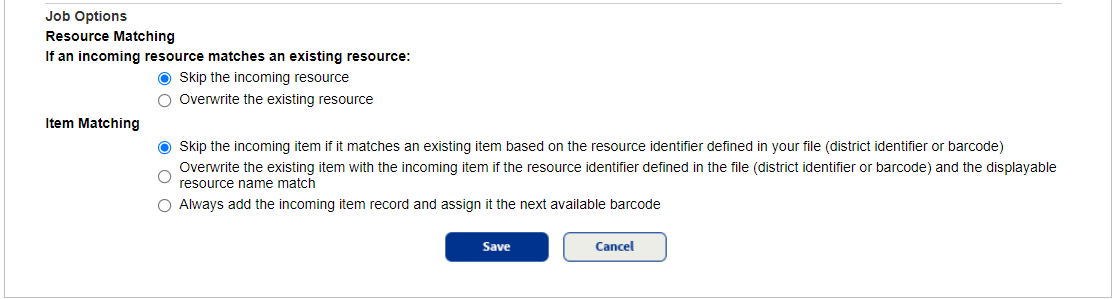
- Click Save.
After you save the setup, make sure to monitor updates. Each scheduled update appears in the Scheduled Import Resources list and has a link to the Job Summary and the date and time of the next scheduled run.