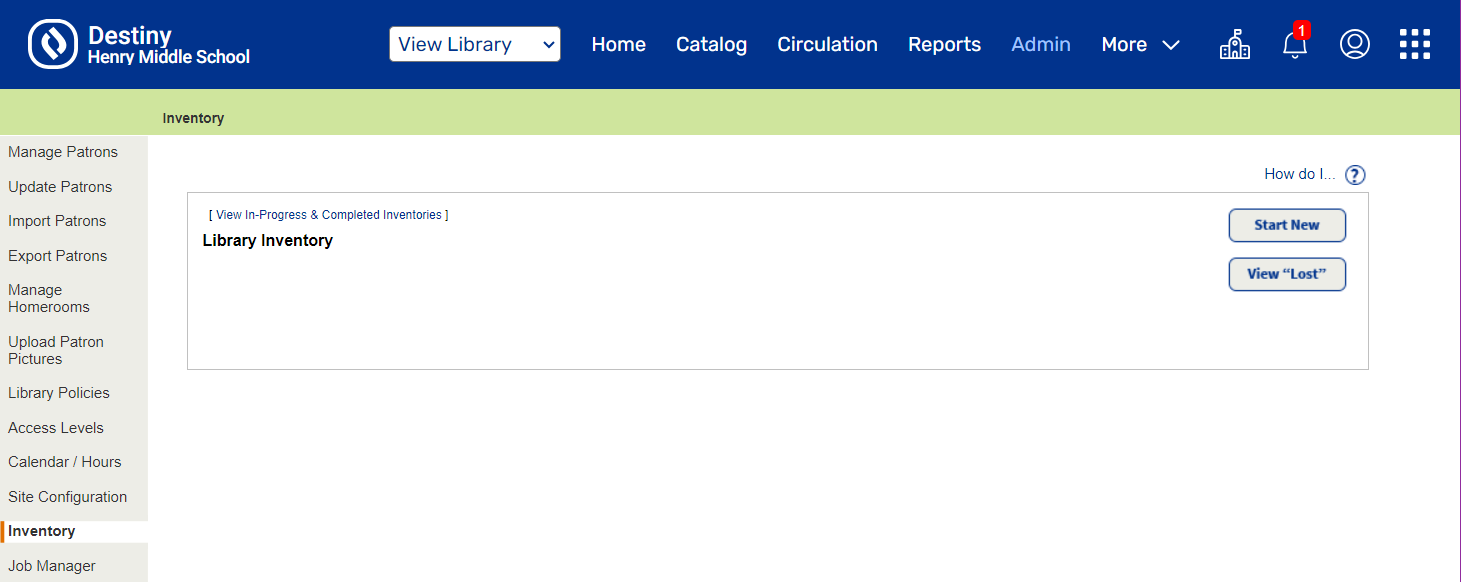
Start an inventory (Library Manager)
Tracking the location and status of your library materials is an important step in managing your inventory. Library Manager makes it easy to account for each resource, its location, and status.
To start an inventory:
You can conduct either a full or partial inventory.
- Select Admin > Inventory.
- Click Start New.
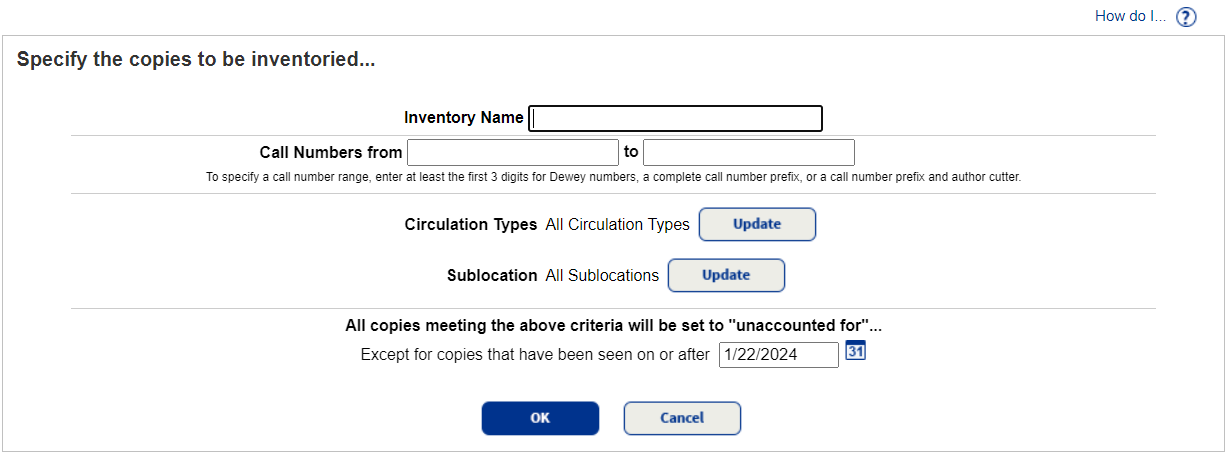
- To inventory your entire collection, leave the Call Numbers from and to fields blank. You can create an inventory for part of your collection, based on a title's full call number and not just its prefix. For example, for a fiction collection, you could just inventory FIC DAA to FIC EZZ.
- To limit your inventory to certain circulation types, such as new releases or audiovisual equipment, click Update next to Circulation Types. The default setting is All Circulation Types.
- To limit your inventory to certain locations, genres, or subjects, click Update next to Sublocation. The default setting is All Sublocations.
- To exclude any items that library staff recently reviewed, enter a date in the Except for copies that have been seen on or after field. For example, entering a date three days ago lets you exclude any items recently checked in or out, or new materials that were cataloged in the last few days.
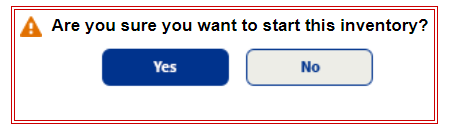
- After setting the inventory criteria, click OK. To begin the inventory, click Yes in the confirmation message.
|
Note: Once you start the inventory, you cannot edit the criteria or rename the inventory. |
You are now ready to start the scan/load library inventory barcodes process to make copies accounted for.