Print a label(s) for a single resource item
Destiny lets you print labels when adding a new copy or replacing a damaged barcode. You can print one or more labels for the same item.
| Note: You can also print copy barcodes for a group of used or unused labels. |
Barcode labels contain the item's scannable barcode, barcode number, and any of three optional fields:
- Site or district name
- Resource name (up to 50 characters)
- Home location (up to 50 characters)
| Important: The first time you print barcodes, test them for usability. |
To print one or more barcode labels for a single item:
-
Do one of the following:
To print a barcode when adding a new item... To print a replacement barcode for an existing item... -
Select either Catalog > Resource Search or Catalog > Add Resource, and search for the item you want.
-
Next to the desired item, click Details.
-
Click Add Item.
-
Enter a starting barcode number.
-
Select the Print labels checkbox.
-
Click Save.
-
Go to Circulation > Item Status, and search for the item you want.
-
If more than one match is found, click the barcode next to the desired copy.
-
Click Edit Item.
-
Select Print Labels.
-
Click Save
-
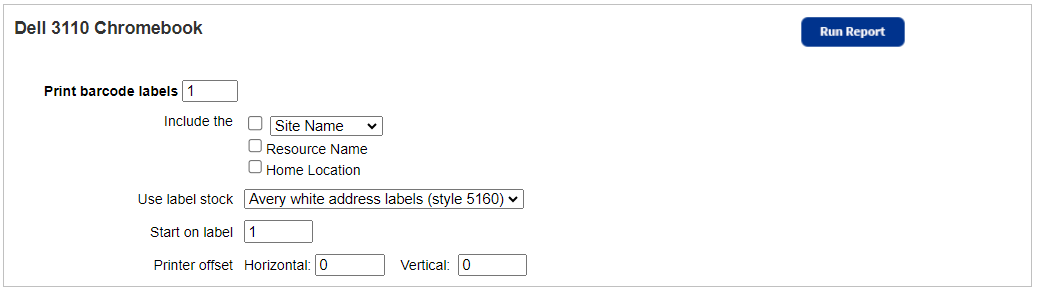
- Use the following table to fill in the fields:
Field Description Print barcode labels Enter the number of barcodes you want for each item.
Include the Select any of the optional fields to include that information on the label.
Note: Barcode labels always include the scannable barcode and barcode number. Use label stock Use the drop-down to choose one of the preloaded label stocks.
Note: Stock from other vendors may not work as well. Make sure to print a test page on plain paper.
To continue using partially-used label sheets, enter the number of the next available label in the Start on label field.
If necessary, set the printer offsets to fine-tune the printing alignment on the barcode labels.
- Click Run Report.
- When the Report Manager opens, click View. The report opens in a browser.
- Do one of the following:
If you want to... Then... Download the label sheet Click . Print the labels - Position the label stock in your printer.
- Click .
- Set the print settings.
Important: Set to:
- Scale at 100%.
- Print on one side.
- Click Print.