Follett 6300 Cordless Scanner
Scanner
|
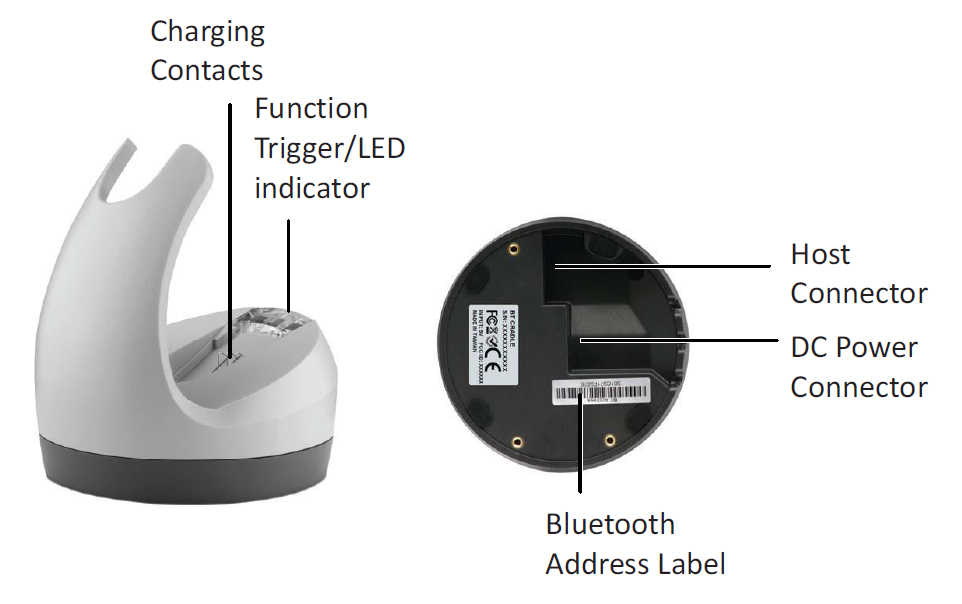
Cradle
|
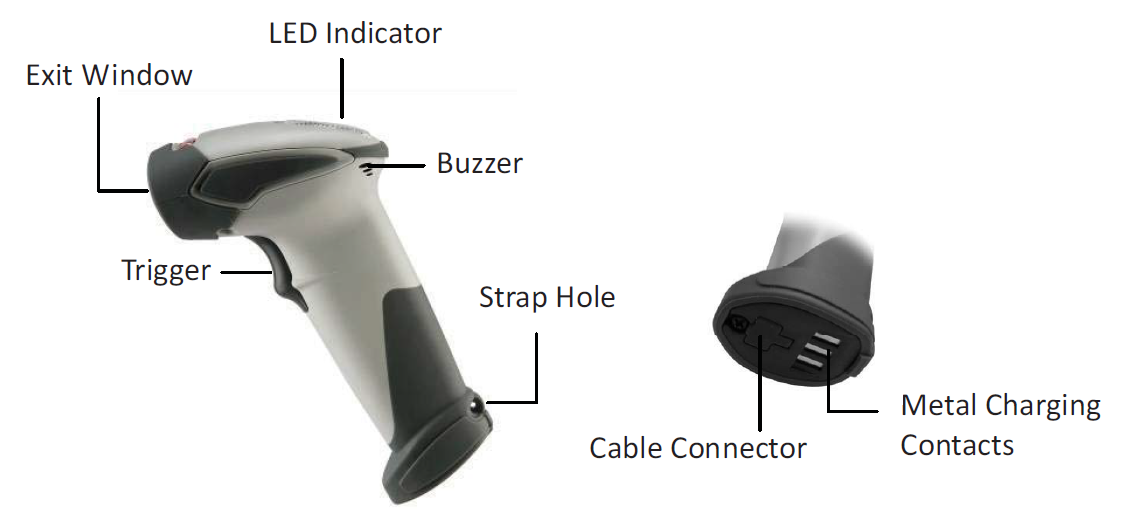
Install the batteries
The rechargeable batteries are packed individually for shipping safety.
To install the batteries:
| CAUTION: Always use the rechargeable batteries provided by the manufacturer to avoid any non-compatibility danger, or void the warranty. |
- Unscrew the cap from the battery compartment at the bottom of the scanner with the set screw.
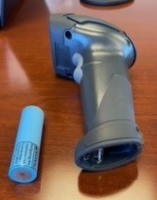
- Insert the battery into the scanner with the + in first.
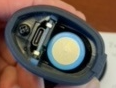
- Close the cap, and ensure the cap is flush with the scanner handle.
- Tighten the screw on the cap to secure the battery.
Install the cable clip
The cable clip is used to hold the mini USB cable in USB Online Mode. With the cable clip, you can easily transform your wireless scanner into a wired one.
Connect the cradle
The cradle host features wireless technology and supports radio communication to the scanner. It can be used for both battery charging and radio communication.
- Insert the RJ-45 connector of your desired communication cable into the bottom of the cradle. You will hear a clear and short “click”. Connect the other end to your computer's USB port.
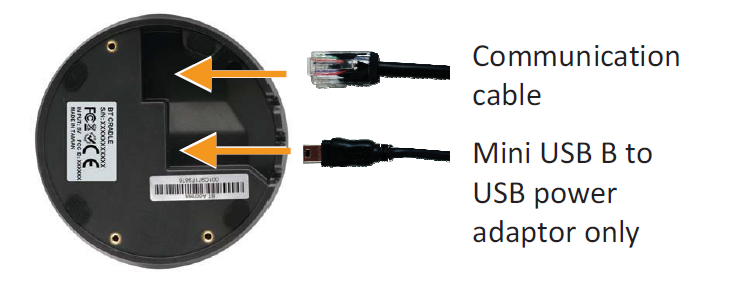
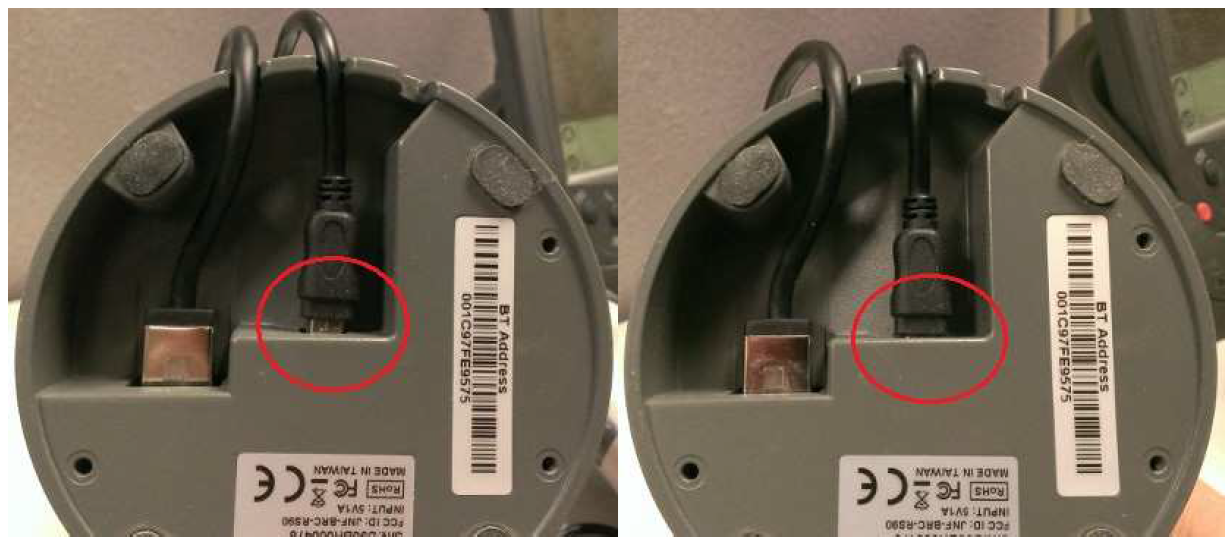
- Connect the included USB cable to the mini USB port at the bottom of the cradle. Ensure it is fully seated (picture on right).
- Connect the other end to a USB power adapter. Plug the adapter into an AC outlet that is not on a timer or controlled by a light switch.
|
Notes:
|
Cradle Host Mode
The scanner communicates with the host through the cradle, and the cradle communicates directly to the host via host interface cable connection. Typically, scanner and cradle in the same delivery box are paired in the factory. As soon as both are powered on, they should find and connect to each other immediately.

To see if the scanner is paired to the cradle, check the scanner LED group1 for a slow blue flash. Also check the top cradle LED for a steady blue light. If LED group1 of the scanner and top LED of cradle are both flashing blue, follow the steps below to radio connect the scanner and cradle.
Cradle Host Pairing
- Connect the cradle and the computer. Ensure the cradle LED is flashing blue, indicating it’s not linked to any scanner. If the LED shows steady blue, the cradle is already paired to another scanner and you must unpair before continuing.
- Power on the scanner, and enable cradle host mode (if necessary).
- Use the scanner to scan the pairing barcode at the bottom of the cradle to begin pairing. You will hear three short beeps.
Note: The LED indicator on the scanner will flash blue rapidly, indicating search mode is in process. The LED on the cradle becomes steady blue when the pairing is successful. - Scan the corresponding host interface the cradle is using to begin using the scanner.
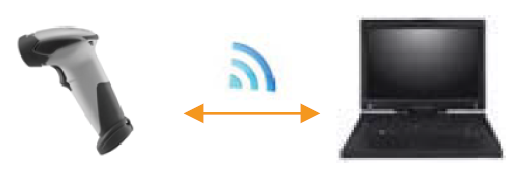
Wireless Mode
The scanner connects to the host via wireless connection. You can select SPP Host or SPP Client for PC connection.
SPP Host Mode
In this mode, the scanner connects to the host/PC via wireless connection and performs like there’s a serial connection. In host mode, the scanner initiates the connection to the remote device.
- Power on the remote device, have its address ready in hand, and make it discoverable.
- Program the scanner with the Scanner SPP Host enable barcode.

- Scan Set wireless address to set the address.

-
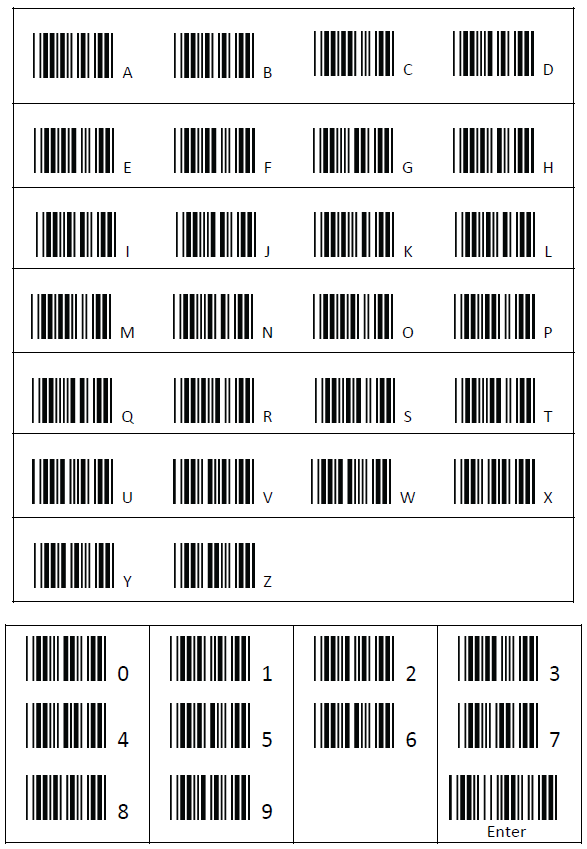
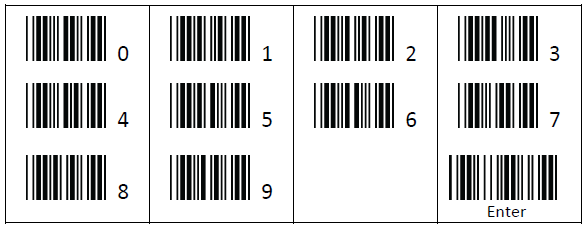
Use the ASCII table at the end of this guide to input the 12-digit wireless address. For example, if the address is “0011B1345600”, scan “0”, “0”, “1”, “1”, “B”, “1”, “3”, “4”, “5”, “6”, “0”, “0” from ASCII barcode labels.
- Scan Confirm Setting to store the address.

- Set up and input the pin code, if necessary. See the Set pin code section for more details.
- Scan Required Pair with client (SPP Host) to begin pairing.

SPP Client Mode
In this mode, the scanner connects to the host/PC via wireless connection and performs like there’s a serial connection. In SPP Client mode, the scanner is discoverable from a remote device, and it can request the scanner for connection. There are several ways to connect the wireless scanner to your PC. If you have your own applications, check their user manuals for pairing instructions.
To connect a wireless device to a Window-based system for the first time:
- Turn on the host computer, and activate its wireless connection.
- Select Add wireless device. Or open the pop-up "BT devices", and click Add.
- Power on the scanner, and program it with the Scanner SPP Client enable label.

- On the Devices tab, click Add. The Add wireless Device wizard appears.
- Select the My device is set up and ready to be found checkbox, and then click Next.
- The scanner should be on the list of discoverable devices. The default name of the scanner is ZBBT. Select ZBBT, and click Next.
- Select Let me choose my own passkey, and enter the pin code. The default pin code is 12345678.
- Click Next to connect the scanner to the host. You should hear a short beep upon connection.
Set pin code
- To change the pin code, use the Set pin code setting. Default is 12345678.
- Use the ASCII table at the end of this guide to input the new code (must be at least 4 digits and not more than 8 numeric digits).
- Scan Confirm Setting to store the pin code.

ASCII Table
Connect the Scanner to a MAC
Administrative access is needed the first time a USB scanner is connected to aMAC. The keyboard assistant must open to access the type of device being connected.
To connect the scanner to a MAC:
-
Log onto your MAC with administrator access.
-
Plug the scanner in to a USB port on the MAC.
Note: Do not plug the scanner into a USB port on the keyboard because it does not provide enough power.
- The keyboard assistant should open.
Note: If it does not, go to System Preferences, and click Keyboard.
- Click Change Keyboard Type.
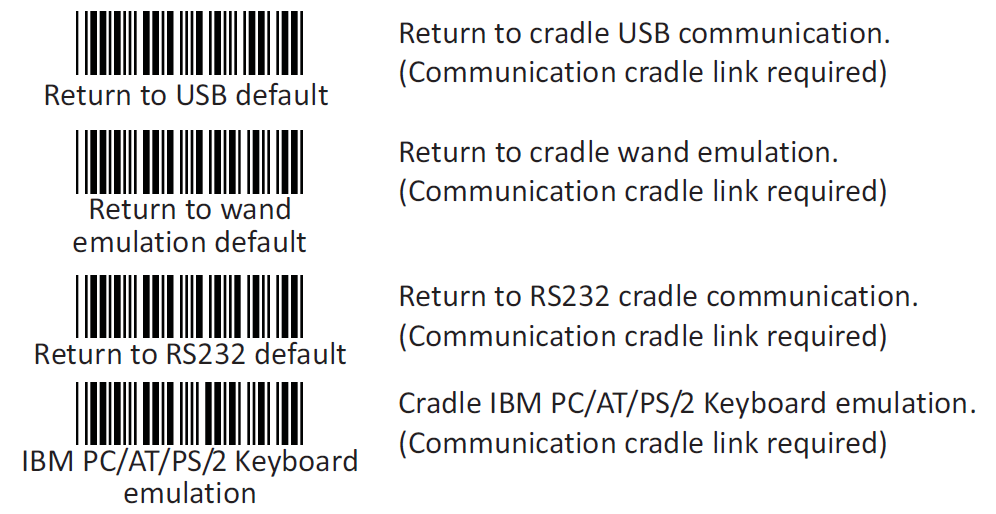
Note: If that button does not appear, scan the following barcodes in the order shown:
- Start of configuration.

- Return to USB default, return the scanner to the cradle.

- End of configuration.

- Start of configuration.
- Click Continue. A window appears with a message to press any key on your keyboard to identify it. DO NOT press a key, instead scan the barcode:

- On the keyboard/interface selection screen that appears, select ANSI (United States and others).
- Click Done.
The scanner is now ready to use.
Click here to download the pdf.