Edit Home page (Library Manager)
Customizing your Home page is a great way to welcome your patrons to the online catalog, highlight available resources, announce events, and encourage patrons to use the library regularly.
You can create groups, hyperlinks and text. Using Hyper Text Markup Language (HTML) gives you endless options, such as adding graphics, tables, shading, etc. A customized home page can enhance your patrons' experience.
|
Important: To customize the Home page, you must have the Edit home page permission. See Library Materials Permissions for more on Library Manager permissions. |
|
Notes:
|
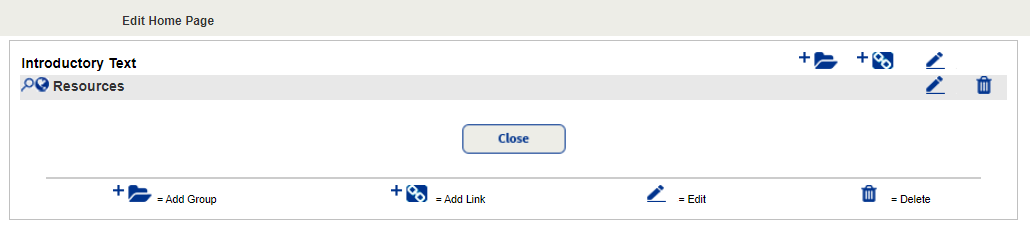
Edit Home Page
- Log in to your site.
- Select Home > Edit Page.
- Next to Introductory Text, click
 .
. 
- In the Title field, enter a title in plain text.

- In the Body field, enter plain text or HTML.
Note: Plain text will appear as text on your Home page. To format text you must use HTML.
- In the Title field, enter a title in plain text.
- To add an image, use the following steps:
Note: You may only add images from a server. If you do not have access to the Destiny server, you can also use a public server.
- In the \FSC-Destiny\fsc\districtResources\images directory, create a \homepage folder.
- Add the graphics files to the folder.
- Then, add the following HTML to the IntroductoryText to point to the file, such as:
<img src=”/imagestore/homepage/picture.jpg”>.
Note: Make sure to use “/imagestore” and not “/images”.
- When you are finished, click Save.
Create a group
You can use groups to provide organized lists of URLs to your patrons. For example, you can create a group called ‘Reference Links’ and add the URLs of different online dictionaries and encyclopedias. Use the following steps to create a group:
- Select Home > Edit Page >
 .
. - Enter a Group Name.

- Enter the Sort Order.
- Click Save.
Repeat these steps for each desired group.
Add links to a group
- Select Home > Edit Page >
 .
.
- In the Display Text field, enter the text you want to display on your Home page.
- Enter the URL.
- In the Group drop-down, select the group for the link.
- Click Save.
|
Note: Links appear in alphabetical order within a group. |
When you are finished customizing the Home page, creating groups, and adding links to groups, click Close.